Introduction:
Welcome
Hi! Great day! Welcome to this course. Thank you for taking an interest in this course. Learning from this course will help you become an IT Professional.
Lecture 1:
1. Media Environments
INTRODUCTION TO INFORMATION AND COMMUNICATIONS TECHNOLOGY
ICT – Information and Communication Technology
- an infrastructure and components which enable modern computing.
- is also the technologies (i.e., devices, systems, or applications) that will process data into information
Information – is the knowledge we obtain from reading, studying, investigation, or research.
Communication – is the exchanging of data or information from two or more things
Republic Acts related to ICT
R.A. 10173 – Data Privacy Act
R.A. 10175 – Cyber-Bullying Act
R.A. 9995 – Anti-Photo and Video Voyeurism Act
R.A. 8792 – E-Commerce Act
R.A. 10844 – DICT Act
R.A. 9775 – Anti-Child Pornography Act
Current situation of ICT in the Philippines
- Back then, PH is the texting capital of the world
- Now, it is the social media capital of the world with 83M people active in social media
- PH is a country with one of the slowest but most expensive internet in the world
- PH ranks 15 out of 15 in South-East Asian countries with slowest internet
Brief Timeline of Technology
3500 BC – Sumerians developed cuneiform writing.
1500 BC – Phoenician developed their alphabet
105 BC – Cai Lun (“Tsai Lun”) of China invented the paper.
Circa 1439 – Johannes Gutenberg invented his first printing press.
1604 – Blaize Pascal invented the first commercial calculator.
1793 – Charles Chappe invented the first telegraph, and the telegraph line system.
1832 – Electric telegraph was invented.
1876 – Alexander Graham Bell invented the
telephone.
1906 – First radio audio broadcast.
1925 – John Logie Baird invented television.
1941 – Konrad Zuse builds a mechanical calculator, Z3. It was the first functional program-controlled computer.
1969 – Arpanet, the first internet was created.
1971 – The first email was created and sent.
1971 – Bob Thomas wrote the first computer virus named Creeper.
1975 – The first laptop appeared.
1990 – The World Wide Web was created by Tim Berners-Lee.
1991 – First web page was created.
1992 – The first SMS was sent.
Usage of ICT in daily life
- Banking – All banking transaction are now controlled using computers.
- Education – Educational institutions are now going computerized when it comes to their basic services.
- Government – Government agencies made their transactions faster and easier by implementing online systems.
- Health and Wellness – Medical systems are now made available in the market to make health monitoring faster and easier.
- Agriculture – The ICT in agriculture (e-agriculture) focuses on the enhancement of agricultural and rural development through improved information and communication processes.
- Business (E-Commerce) – ICT helps people in making buying or selling easier.
- Transportation – Information and communication technologies (ICT) have considerable importance for transport systems
Because of ICT…
- Borderless communication
- Faster communication speed
- Lower communication costs
- Reliable mode of information
- Paperless environment
Bad Impacts of ICT
- Social problems
- Health problems
The World Wide Web
Web 1.0
- Static web
- Pure ads
Web 2.0
- Dynamic Web
- Interaction between users and computers
- Can leave comments and use tags
Web 3.0
- Semantic Web
- Artificial intelligence
Trends in ICT under Web 3.0
- Technological Convergence – doing tasks using different devices
- SYNC
- Mobile Technologies – everything can be accessed in mobile
- Social Media
- Types of Social Media
- Social Networking Sites – group of people with same interest (Omegle)
- Microblogging – posting with limited characters (Twitter)
- Media Sharing – posting pictures, songs, and videos (Soundcloud, Youtube)
- Bookmarking Sites – saving images, videos, and songs for future purposes (Pinterest)
- Blogs and Forums – certain topics with discussions
- Assistive Media – for visually impaired
- Connected Augmented Intelligence – AR/VR; machine language (Sofia the Robot)
THE 10 COMMANDMENTS OF COMPUTER ETHICS
- Thou shalt not use a computer to harm other people.
- Thou shalt not interfere with other people’s computer work.
- Thou shalt not snoop around in other people’s files.
- Thou shalt not use a computer to steal.
- Thou shalt not use a computer to bear false witness.
- Thou shalt not use or copy software for which you have not paid.
- Thou shalt not use other people’s computer resources without authorization.
- Thou shalt not appropriate other people’s intellectual output.
- Thou shalt think about the social consequences of the program you write.
- Thou shalt use a computer in ways that show consideration and respect.
Hackers – internet villains
- Person or entity who gains access without authorization or compensation
White Hackers – good hackers
Black Hackers – bad hackers
Malware – Malicious software
- Virus – spreads quickly through files
- Worm – spreads through internet
Spyware – software that keeps track of your passwords, usernames, and other info
Ransomware – software that locks out your files and will unlock them in exchange of money
Phishing – E-mail scam that reveals your personal information and uses it for illegal actions
Lecture 2:
2. Old Media in a New Media World
- THE EVOLUTION OF WEB
The web today is a growing universe of interlinked web pages and web apps, teeming with videos, photos, and interactive content. What the average user doesn’t see is the interplay of web technologies and browsers that makes all this possible.
Over time web technologies have evolved to give web developers the ability to create new generations of useful and immersive web experiences. Today’s web is a result of the ongoing efforts of an open web community that helps define these web technologies, like HTML5, CSS3 and WebGL and ensure that they’re supported in all web browsers.
The color bands in this visualization represent the interaction between web technologies and browsers, which brings to life the many powerful web apps that we use daily.
The following diagram briefly defines evolution of World Wide Web:
- DESCRIBE THE DIFFER USES OF VARIOUS TYPES OF WEBSITES.
12 Popular Types of Websites You Can Create
The web is vast. As of now, there are billions of websites online, all competing for some share of the attention people give to their online browsing each day. When you’re starting a new website, it can be overwhelming to think about all the other websites out there.
But it’s helpful to remember that within that huge number of websites, you have a lot of different categories of types of websites trying to accomplish different things. As you consider how best to build your own website, carefully consider what type of website you want it to be. When you can narrow down the goals and setup you have in mind, you can more easily identify the other websites in your category to look to for inspiration.
Here are twelve of the most popular types of websites you’ll see around the web. While there’s some overlap between the different categories, in general each type of website has certain goals to achieve and its own set of best practices. Which one will your website be?
1. E-commerce Website
An e-commerce website is a website people can directly buy products from. You’ve probably used a number of e-commerce websites before, most big brands and plenty of smaller ones have one. Any website that includes a shopping cart and a way for you to provide credit card information to make a purchase falls into this category.
Ecommerce websites can be an extension of a business you already have, or become something you build a new business around.
2. Business Website
A business website is any website that’s devoted to representing a specific business. It should be branded like the business (the same logo and positioning) and communicate the types of products and/or services the business offers.
By now, every business out there should have a website. It’s a widespread expectation. Every potential customer you encounter will just assume that if they Google your business looking for more information, they’ll find a website. And if they don’t, it makes the business look less professional or legitimate.
E-commerce websites are business websites, but it’s also possible to have business websites that don’t sell anything directly, but rather encourage visitors to get in contact for more information (a lead generation website) or come to a storefront if they’re interested in becoming customers.
3. Entertainment Website
If you think about your internet browsing habits, you can probably think of a few websites that you visit purely for entertainment purposes. They could be humor websites like The Onion, webcomics like xkcd, or just websites with fun or interesting content like Buzzfeed.
Most of these websites do aim to make money like business and e-commerce websites do, but usually through the advertisements that show up on the page rather than through selling specific products or services.
If you want to start an entertainment website, you’ve got a lot of options for formats that can take. You could make funny or informative videos, write entertaining blog posts, draw comics, or create fun quizzes.
Since there are so many entertainment websites out there, you should anticipate it taking some time and work to find an audience that connects with you (and even more time and work to start making money, if that’s your ultimate goal), but if you’ve got ideas for content to create that you think people will find entertaining, an entertainment website is one of the best ways to get that content out into the world.
4. Portfolio Website
Portfolio websites are sites devoted to showing examples of past work. Service providers who want to show potential clients the quality of the work they provide can use a portfolio website to collect some of the best samples of past work they’ve done. This type of website is simpler to build than a business website and more focused on a particular task: collecting work samples.
This type of website is most common for creative professionals and freelancers that are hired based on demonstrated skill and can be a more efficient alternative to a business website that serves a similar focus.
5. Media Website
Media websites collect news stories or other reporting. There’s some overlap here with entertainment websites, but media websites are more likely to include reported pieces in addition to or instead of content meant purely for entertainment. This category includes sites like the Washington Post website, Slate, and Inc.
Media websites generally make money through either advertisements that show up on the site, subscription models, or some combination of the two.
Many media websites are the online branch of media properties that often exist in other forms, like TV channels or print magazines and newspapers, but some are online only.
6. Brochure Website
Brochure websites are a simplified form of business websites. For businesses that know they need an online presence, but don’t want to invest a lot into it (maybe you’re confident you’ll continue to get most of your business from other sources), a simple brochure site that includes just a few pages that lay out the basics of what you do and provide contact information may be enough for you.
Brochure sites were more common in the earlier days of the internet when businesses knew they needed a website, but also expected not to be dependent on it for success. Now that the internet is such a big part of how people research and find just about every product and service they need, most businesses recognize that they need something more competitive.
If you have a business and know you don’t need your website to be a marketing tool that brings in new business, you just need something more like an online business card, then a brochure website may do the trick.
7. Nonprofit Website
In the same way that businesses need websites to be their online presence, nonprofits do as well. A nonprofit website is the easiest way for many potential donors to make donations and will be the first place many people look to learn more about a nonprofit and determine if they want to support it.
If you have or are considering starting a nonprofit, then building a website for your organization is a crucial step in proving your legitimacy and reaching more people. You can use it to promote the projects your organization tackles, encourage followers to take action, and for accepting donations.
Note: To take donations through the website, you’ll have to take some of the same steps that the owners of ecommerce sites do. In particular, make sure you get an SSL certificate to make sure all payments are secure, and set up a merchant account so that you can accept credit card payments.
8. Educational Website
The websites of educational institutions and those offering online courses fall into the category of educational websites. These websites have the primary goal of either providing educational materials to visitors, or providing information on an educational institution to them.
Some educational websites will have advertisements like entertainment and media websites do. Some offer subscription models or educational products for purchase. And some serve as the online presence for an existing institution.
9. Infopreneur Website
Infopreneur websites overlap a bit with business and ecommerce websites, but they represent a unique type of online business. Infopreneurs create and sell information products. That could be in the form of courses, tutorials, videos or ebooks.
Whatever form it takes, infopreneurs need their website to do the hard work of building up a knowledge brand – convincing visitors that they know enough to make their educational products worth buying – and the work of selling those products.
To sell information products securely, they’ll need some of the same tools of an ecommerce website, including an SSL certificate and a merchant account. Those with a lot of knowledge products should also invest in ecommerce software to make it easier for visitors to select and purchase the ones they’re interested in.
Infopreneurs normally create a mix of valuable free content and premium content they charge for. The infopreneur’s website serves as the central location for both things – the free content which serves as a marketing tool to get people onto the site, and the paid products that account for their profits. Building a good website is therefore crucial for this type of business model.
10. Personal Website
Not all websites exist to make money in some way or another. Many people find value in creating personal websites to put their own thoughts out into the world. This category includes personal blogs, vlogs, and photo diaries people share with the world.
Sometimes these websites can evolve into something that makes money if they become popular enough and the person who started them wants to make that shift, but they primarily exist as a way to share your feelings, insights, and art with any friends and strangers that might be interested.
Building a personal website is easier than most of the other websites on the list since the goal has lower stakes. You just want to make it look like you want, rather than worrying about driving sales or making ad money. Some simple templates or an easy-to-use website web builder should be all it takes to get something up that satisfies your desire to share.
11. Web Portal
Web portals are often websites designed for internal purposes at a business, organization, or institution. They collect information in different formats from different sources into one place to make all relevant information accessible to the people who need to see it. They often involve a login and personalized views for different users that ensure the information that’s accessible is most useful to their particular needs.
Web portals will generally involve more complicated programming and design than most of the other websites described on this list, so make the most sense for skilled and experienced web programmers to consider.
12. Wiki or Community Forum Website
Most people are familiar with wikis through the most famous example of one out there: Wikipedia. But wikis can be created on pretty much any subject you can imagine. A wiki is any website where various users are able to collaborate on content and all make their own tweaks and changes as they see fit. There are wikis for fan communities, for business resources, and for collecting valuable information sources.
Starting a wiki can be fairly simple, especially if you choose to use an existing software or wiki site builder rather than trying to create the website from scratch. This option makes the most sense if you need to organize available information and resources into a central space that you want others to have access to.
- DESCRIBE HOW THE WEB USES GRAPHICS, ANIMATIONS, AUDIO & VIDEO
Some Web pages use multimedia, which combines text with graphics, animation, audio, video, and virtual reality.
A graphic is a digital representation of non-text information such as a drawing, chart, or photo.
Animation is the appearance of motion created by displaying series of still images in sequence.
Audio is music, speech, or any other sound.
Video consists of full-motion images.
Virtual reality is the use of computers to simulate an environment that appears as a three-dimensional space.
A plug-in is a program that extends a browser’s capability to display multimedia elements.
- IDENTIFY DIFFER ONLINE SYSTEMS, FUNCTIONS, & FLATFORMS AVAILABLE TODAY.
- Ayame Productions GOOD DAY! EMPOWERMENT TECHNOLOGIES
- Tumblr
- MS PowerPoint
- Google Maps
- Adobe Photoshop
- Google Chrome
- YouTube
- Blogger
- LandBank
- Smart Telecommunications
- Online Systems, Functions, and Platforms
- PLATFORMS If you can program it, then it’s a platform. If you can’t, then it’s not.” – Marc Andreessen
- Online Platforms in ICT It makes it easier for users to interact, to collect, and use the data from the user’s interactions for their own particular needs.
- Online Platform Categories • Social Media • Search Engines • Communication Services • Payment Systems • Advertising Platforms • Creative Content Outlets
- PLATFORMS Web Search Engines It is a software system that is designed to search for information on the World Wide Web (WWW). The search results are generally presented in a line of results referred to as Search Engine Results Page (SERPs). The information may be a mix of webpages, images, and other types of files.
- Top 10 Search Engines (2016) 1. Google 2. Bing (Microsoft) 3. Yahoo (No. 1 email provider) 4. Ask.com (Ask Jeeves) 5. AOL.com (America Online) 6. Baidu (China) 7. Wolframalpha (Computational Knowledge Engine) 8. DuckDuckGo (simple) 9. Internet Archive (histories of a domain) 10. ChaCha.com (similar to Ask.com)
- PLATFORMS Communication Services These are outsourced enterprise communications solutions that can be leased from a single vendor or provider. A Communications Service Provider (CSP) is a provider that transports information electronically and can encompass public and private companies in telecom, internet, cable, satellite, and managed services business.
- Telecom & Internet Cable
- PLATFORMS Payment System It is any system used to settle financial transactions through transfer of monetary value, and includes the institutions, instruments, people, rules, procedures, standards, and technologies.
- PLATFORMS Advertising Platforms It allows users to create and manage advertising campaigns, generate reports, and retrieve information about the ads, campaigns, and organizations that are associated with an account.
- PLATFORMS Creative Content Outlets It is content that needs to be translated creatively. Topic/concept à Creative presentation it
- ONLINE PLATFORMS 1. Presentation Tools – Prezi, Zoho Shows, MS PowerPoint. 2. Newsletter, ICT Content Platforms – Dropbox, Tumblr, Wix 3. Photo Editing Tools – Picasa, Adobe Photoshop, GIMP 4. Video Editing Tools – Sony Vegas Pro, Windows Movie Maker, Adobe Premier Pro 5. Photo uploading and hosting Tools – Dropbox, Flickr 6. Online Collaborative Tools – Google Drive, Viber, Facebook 7. Cloud Computing – Dropbox, Google Drive, Microsoft One Drive
- ONLINE PLATFORMS 8. Blog Tools – Blogger, WordPress, LiveJournal 9. Mapping Tools – Google Maps, Waze, Wikimapia 10. Music Production – Sony Vegas Pro, Audacity, Virtual DJ 11. Survey and Forms – Google Forms 12. ICT Projects and Content Publishing and Uploading Platforms – WordPress, MS Office Project Server, File Manager 13. Web Design Platforms – Wix, Weebly, Adobe Dreamweaver 14. Web Management Platforms – Drupal, WordPress, Joomla
- Tumblr
- MS PowerPoint
- Google Maps
- Adobe Photoshop
- Google Chrome
- YouTube
- Blogger
- LandBank
- Smart Telecommunications
An online system is a system that is connected to the Internet. An offline system would be a system that is disconnected from the Internet.
The online functions include email notifications from our server (emails using another server are not included), the updating of web blacklists (lists of undesirable websites), updating of the list of file-sharing programs (prohibited programs page), and remote access to Child Control through the Internet. Free program updates are also included.
Online Platform – an online marketplace that places one party in touch with another, such as buyers and sellers. Examples are eBay, Craigslist, Amazon Marketplace, Airbnb and Uber. The online system may be entirely self-contained, or it may allow third-party apps to connect via the platform’s programming.
- GIVE AT LEAST 5 LATEST TRENDS IN TECHNOLOGY.
1. 5G Networks
Spain’s National 5G Plan for 2018-2020 stipulates that throughout 2019, pilot projects based on 5G will be developed resulting in the release of the second digital dividend. Hence, the groundwork is being laid so that in 2020 we will be able to browse the Internet on a smartphone at a speed that will reach 10 gigabytes per second. Data from Statista, a provider of market and consumer data, indicates that by 2024, 5G mobile network technology will have reached more than 40 percent of the global population, with close to 1.5 billion users.
2. Artificial Intelligence (AI)
This trend has appeared in all the lineups for a few years now, but everything indicates that this year will be the year it takes off definitively. This is the year we’ll see its democratization, while it is even included in the political agenda. At the beginning of December, the European Commission released a communication on AI directing the member states to define a national strategy addressing this topic by mid-2019.
3. Autonomous Devices
In respect to the previous point robots, drones, and autonomous vehicles are some of the innovations in the category the consulting firm Gartner labels “Autonomous Things” defined as the use of artificial intelligence to automate functions that were previously performed by people. This trend goes further than mere automation using rigid programming models, because AI is now being implemented to develop advanced behavior, interacting in a more natural way with the environment and its users.
4. Blockchain
Blockchain technology is another topic that frequently appears on these end of year lists. It has now broken free from an exclusive association with the world of cryptocurrencies; its usefulness has been proven in other areas. In 2019 we will witness many blockchain projects get off the ground as they try to address challenges that still face the technology in different fields like banking and insurance. It will also be a decisive year for the roll-out of decentralized organizations that work with intelligent contracts.
5. Augmented Analytics
This trend represents another stride for big data, by combining it with artificial intelligence. Using machine learning (automated learning), it will transform the development, sharing, and consumption of data analysis. It is anticipated that the capabilities of augmented analytics will soon be commonly adopted not only to work with data, but also to implement in-house business applications related to human resources, finance, sales, marketing and customer support – all with the aim to optimize decisions by using deep data analysis.
6. Digital Twins
A digital twin is a virtual replica of a real-world system or entity. Gartner predicts that there will be more than 20 billion sensors connected to end points by 2020, but the consulting firm goes on to point out that there will also be digital twins for thousands upon thousands of these solutions, with the express purpose of monitoring their behavior. Initially, organizations will implement these replicas, which will continue to be developed over time, improving their ability to compile and visualize the right data, make improvements, and respond effectively to business objectives.
7. Enhanced Edge Computing
Edge computing is a trend that relates most specifically to the Internet of Things. It consists in placing intermediate points between connected objects. Data can be processed at these intermediate points, thus facilitating tasks that can be performed closer to where the data has been received, thus reducing traffic and latency when responses are sent. With this approach, processing is kept closer to the end point rather than having the data sent to a centralized server in the cloud. Still, instead of creating a totally new architecture, cloud computing and edge computing will be developed as complementary models with solutions in the cloud, administered as a centralized service that runs not only on centralized servers but also on distributed servers and in the edge devices themselves.
8. Immersive Experiences in Smart Spaces
Chatbots integrated into different chat and voice assistance platforms are changing the way people interact with the digital world, just like virtual reality (VR), augmented reality (AR), and mixed reality (MR). The combination of these technologies will dramatically change our perception of the world that surrounds us by creating smart spaces where more immersive, interactive, and automated experiences can occur for a specific group of people or for defined industry cases.
9. Digital Ethics and Privacy
Digital ethics and privacy are topics that are receiving more and more attention from both private individuals as well as associations and government organizations. For good reason, people are increasingly concerned about how their personal data is being used by public and private sector organizations. Therefore, we conclude that the winning organizations will be those that proactively address these concerns and are able to earn their customers’ trust.
Lecture 3:
Creating the best talking head videos
1. Be a presenting head, not a reading head.
Firstly, you want to ditch the script. Now that doesn’t mean you can’t write one. You need to make sure you present instead of read.
Scripts can often cause people to become lazy as they feel they have done the hard work, but delivery is 50% of the battle when it comes to making the best talking head videos.
Presenting is a device you need to use to make sure your script sinks in and resonates with your viewer. That means you’ll need energy and confidence.
Getting this right will instantly give you more credibility, hook your viewer and make the whole experience more pleasurable for everyone.
What about an AutoQueue?
The danger of reading from an autocue is once again you rely too heavily on the script to do the hard work.
The good thing is you don’t have to try to remember what to say, but you do have to follow words on a screen which still requires a level of concentration. Without a tonne of practice, this will distract you from focusing on what counts, your energy and style.
What’s the solution?
Try presenting from bullet points. We often find that because people know the content already, once they are in the zone, they talk to the viewer in the same excited manner they would speak to a client or prospect. This can make all the difference.
The need to try and remember suddenly vanishes because deep down, you won’t need lines if you’re an expert in your subject.
2. Be prepared to fail.
As adults, we are not used to doing things that are entirely out of our comfort zone. We tend to have worked out what we do and don’t like doing earlier in life and stick to that.
Presenting your talking head video tends to fall into the gap of things we don’t like doing because it means failing at something which again, as adults, is something we try to avoid.
The best way to approach doing a talking head video is to go into it thinking that you’re not going to get it right on the first take. And trust us, you won’t!
If you prepare to fail, you are already one step closer to making the best talking head videos. And you never know… you might even enjoy it.
3. Chunks
So, you’ve got to talk to the camera for 90 seconds, but you’ve taken our advice and have ditched reading a script. How on Earth do you remember everything? Well, you break it into chunks.
You present sentence by sentence. Every time there’s a new piece of information you cut, you move the camera further away or closer to you, and you start again.
Why does chunking work so well?
It’s effective for a few reasons. Chunking like this wakes the viewer up. It keeps the energy high, and there’s a good chance your viewer will keep watching for longer.
It also enables you to spend time on the delivery of each line. You can put more emphasis on different words, speed it up and slow it down and make sure your delivery is nothing short of fantastic.
4. Talking head video length
Talking heads are a simplified form of digital communication. Basically, keep it short.
If you’re making a promo don’t go above 90 seconds. Ideally, 40 seconds.
For educational videos, you can go longer as long as don’t keep repeating yourself and waffle on.
It needs to be as short as you can make it while delivering the most concise information.
Unless, of course, you are teaching quantum physics to toddlers. In which case, you can go on for longer…
5. Text and Imagery
Just standing there talking to a camera can be an uninspiring experience.
You need to add text and imagery to back up what’s being said.
The fantastic thing about putting text up on the screen is that it’s impossible not to read. When people see, listen and read they suck up all your information like a sponge.
Adding text and graphics to a video will also make it easier for your audience to understand your message and bring the whole project to life.
For us, it’s a great chance to use humor and tell more of a story.
6. Master your intro with a shoppers pivot
You’ve got to put the most effort into your introduction. People are browsing, and they’re so uninspired by most of what they are watching as they do this.
The trick is to slap them around the chops with something interesting to get them going.
We call this a shoppers’ pivot. It could be a metaphor, to sum up the whole message of the video up in a visual way or just something that makes the viewer go ‘Where’s this going?’ by intriguing them.
It could also be a story which is relevant to the point your entire video is making.
Stories help us engage with information and picture what is being said which helps us understand it better.
The intro is where we spend the majority of time because if you don’t hook someone, they won’t get very far.
7. Entertain
If you’re planning on being very matter-of-fact and just telling people precisely what it is that you do (in a particularly dull tone), then they’re not going to watch any further.
A talking head video is an opportunity to show off your brands personality. It doesn’t matter if you’re selling bins or software, spending the time to make something more entertaining will pay dividends.
Using the shopper’s pivot device from the previous point will create a feeling of entertainment straight away.
From there all you need to do is deliver the content with energy, avoid all waffle and deliver new information after new information.
Do this, and you’ll stand talking head and shoulders above everyone else.
8. The loop
The Loop is the ultimate ending to a talking head video. But what is it?
The loop is at the end of your video and it refers back to the shopper’s pivot you used at the start.
The result of a loop is closure. Think about the feeling you get at the end of a movie when it doesn’t end as expected but surprises you and somehow makes the whole film more enjoyable.
You can give people that same feeling with a talking head video.
How to use a loop?
Firstly you need to have a shopper’s pivot (Check out point 7 if you skipped it).
All you do is make an absurd reference back to that pivot at the end of the video.
This is the place to have a little fun and to make the viewer smile. Getting this right will make it clear you not only put the care and effort in to your content but that you care enough about providing your viewer with an experience. Your competition in comparison will seem stale.
Lecture 4:
3. New Technologies, Old Technologies and Millennials
I. The Internet
The Internet is defined as a worldwide network connecting to a million of computers
via dedicated routers and servers.
It is a network of networks that consist of private, public, academic, business and
government networks of local to global scope, linked by a broad array of electronic,
wireless, and optical network technologies.
The Internet carries a vast range of information resources and services, such as the
interlinked hypertext documents and applications of the World Wide Web, electronic
mail, telephony, and file sharing.
Lecture 5:
History of Internet
The history of the Internet begins with the development of electronic computers in
the 1950’s. Initial concepts of wide area networking originated in several computer
science laboratories in the United States, United Kingdom, and France.
Before it became known as the Internet, ARPANET (Advanced Research Projects
Agency Network) served universities, defense contractors, and a few government
agencies.
ARPANET initially served as a backbone for interconnection of regional academic
and military networks in the 1980’s.
Vint Cerf (Vinton gray)
Is an American computer scientist, who is recognized as one of the “Fathers of the
Internet,” sharing this title with American computer scientist Bob Kahn.
Lecture 6:
Who Uses the Internet?
Teachers and Students at Universities, Community Colleges.
Professors and Researches at Universities and in Research Division of
Corporation
Professionals in Businesses Large and Small.
State and Local Government Officials
Reporters
Celebrities
What Things Can Do On The Internet?
Conduct Collaborative Research
Conduct Free Telephone Calls
Visit many major Museums and Galleries Worldwide
Provide a Forum for Exchanging Opinions and Information
Lecture 7:
Jobs the Internet Can Do
There is only one simple job that the internet does, and it is to move, transfer, or
assign computerized information from one place to another. This information can
be in the form of Text, Documents, Images, Audio, Video and Software
Programs, among others. All this information is data.
The internet can handle different kinds of information and assist people to perform
various jobs-from the simple task of handling e-mail, searching on websites, and
sending chat messages.
How Internet Works
The Internet works through a packet routing in accordance with the Internet
Protocol (IP), the Transport Control Protocol (TCP) and other protocols.
The Internet is made up of massive network of specialized computers called
routers. Each routers job is to know how to move packets along from their source
of destination. A packet will have moved through multiple routers during its journey.
When a packets moves from one another to the next, it’s called hop.
Different Types of Internet Connections
Dial-Up
Dial-Up access is cheap but slow. A modem (internal or external) connects to the
internet after the computer dials a phone number.
DSL (Digital Subscriber Line)
It is an Internet connection that is always “on”. DSL uses a router to transport data
and the range of connection speed, depending on the service offered.
Cable
Cable provides an internet connection through a cable modem and operates over
cable TV lines.
Wireless
Wireless, or Wi-Fi, as the name suggests, does not use telephone lines or cables to
connect to the internet. Instead, it uses radio frequency. Wireless is also an
always on connection and it can be accessed from just about anywhere.
Satellite
Satellite accesses the internet via a satellite in Earth’s orbit. The enormous distance
that a signal travels from earth to satellite and back again, provides a delayed
connection compared to cable and DSL.
Lecture 8:
Types of Area Networks
The Network allows computers to connect and communicate with different
computers via any medium. LAN, MAN and WAN are the three major types of the
network designed to operate over the area they cover.
LAN (covers the smallest area)
LAN or Local Area Network connects network devices in such a way that
personal computer and workstations can share data, tools and programs. The
group of computers and devices are connected together by a switch, or stack of
switches, using a private addressing scheme as defined by the TCP/IP protocol.
MAN (covers an larger area than LAN)
MAN or Metropolitan Area Network covers a larger area than a LAN and smaller
area as compared to WAN. It connects two or more computers that are apart but
resides in the same or different cities. It covers a large geographical area and
may serve as an ISP (Internet Service Provider). MAN is designed for customers
who need a high-speed connectivity. Speed of MAN ranges in terms of Mbps. It’s hard to design and maintain a Metropolitan Area Network.
Lecture 9:
Creating the best screencast videos
Screencasting Overview
A screencast is a digital video and audio recording of what occurs on a presenter’s computer screen, and it can be used to create sophisticated, information-rich multimedia presentations. The word “screencast” was first coined by columnist Jon Udell in 2005. Udell first used the word in an article published in InfoWorld, describing the benefits of using this technique to show his readers how computer applications worked. In a screencast, the presenter records all the screen activity and images continuously to complete a designated task. Audio can be recorded simultaneously or afterwards in postproduction along with sound effects and music tracks.3
Screencasting can be integrated across the curriculum and into many learning activities. Screencasts are an effective instructional format that can be used for tutorials, demonstrations, digital storytelling, and narrated PowerPoint presentations. During the video editing process a variety of media can be imported into a screencast project, such as video clips, photos, music, and animations. Screencasting is a multimedia alternative to video recording, is easy to use, and helps fill a need for dynamic, engaging content.
Screencasts have many applications, which include:
- Training — such as learning new software and orientations to new products.
- Teaching — a lesson on a particular topic or showing a step-by-step process, in which students can learn material at their own pace or catch up on missed sessions.
- Selling — a product.
- Blogging and YouTube — communicating opinions, facts, and ideas, etc.
Screencast Benefits
As computer technology continues to evolve and advance, many teachers from K–12 and higher education use screencasting as an online or stand-alone teaching tool with traditional teaching approaches to enhance and engage the learning experience of their students. Sugar, Brown, and Luterbach noted that screencasting as an instructional strategy may be viewed as a modern descendent of instructional film and video.4
A screencast can include many multimedia elements — music, sound effects, audio, and graphics — along with text, making any content topic engaging while also appealing to different learning modalities. Mayer’s theory of multimedia learning suggests that animated presentations that have a corresponding audio component, essentially moving picture and sound, provide a more effective learning experience than a more traditional alternative (e.g., a sequence of still images accompanied by descriptive text).5
Screencasting Software
Numerous programs create screencasts, and they vary in size, features, ease of use, and cost. There are free (table 1) and commercial (table 2) screencast software programs available for both the PC and Mac platforms. If you are interested in creating screencasts to supplement your lessons without limitations, I recommend a commercial program such as Camtasia Studio, which has a user-friendly interface and functions designed to be easy to use while providing a quality production.
Table 1. Popular Free Screencast Programs
| Free Screencast Software | Platforms | Company | Record Time Limit | Online Tutorial |
|---|---|---|---|---|
| Jing | PC & Mac | TechSmith | 5 minutes | Online Tuorial |
| Screenr | PC & Mac | Screenr | 5 minutes | Online Tutorial |
| Screencast-o-Matic | PC | Screencast-o-Matic | 5 minutesPro Version – Unlimted ($12/yr) | Online Tutorial |
| CamStudio | PC & Mac | CamStudio | Approximately 10 minutes | Forum and FAQ |
Table 2. Popular Commercial Screencast Programs
| Commercial Screencast Software | Platforms | Company | Cost |
|---|---|---|---|
| Camtasia Studio | PC & Mac | TechSmith | $299.00 |
| iShowU HD Pro | Mac | shinywhitebox | $59.95 |
| Adobe Captivate | PC & Mac | Adobe | $299.00 (Student-Teacher Edition) |
| ScreenFlow | Mac | ScreenFlow | $99.00 |
Creating a presentation in Camtasia is similar in many respects to creating a digital movie. Using Camtasia Studio, teachers can record, edit, and share high-quality instructional movies that can be optimized for many popular distribution methods, including blogs, CD, DVD-ready, HD, iPhone, iPod, Screencast.com, web, or YouTube. For a guide to screencasting software, see Five Awesome Screencasting Tools and Screencasting software: Comparison and features.
Screencast Tools
The following guidelines list some tools I have found useful in creating a professional screencast:
- A PC running Windows 7 or a Mac with the OSX operating system
- Microphone
- USB digital microphone
- Samson Meteor, Samson CO1U, Audio-Technica AT2020, Plantronics Audio 995, or other quality USB podcasting microphone
- Webcam
- Built-in computer webcam
- External Logitech Webcam
- Digital tablet
- A Wacom Bamboo Connect Pen Tablet (CTL470) for text and illustrations
- Drawing application (optional)
- SmoothDraw 3 or other drawing applications
Lecture 10:
4. Dark Side of the Internet
WAN
WAN or Wide Area Network is a computer network that extends over a large
geographical area, although it might be confined within the bounds of a state or
country. A WAN could be a connection of LAN connecting to other LAN’s via
telephone lines and radio waves and may be limited to an enterprise (a
corporation or an organization) or accessible to the public. The technology is high
speed and relatively expensive.
SERVER
A computer on a network that manages network resources.
3
Living in IT Era
Network Topologies
Network topology refers to the physical or logical layout of a network. It defines the
way different nodes are placed and interconnected with each other. Alternately,
network topology may describe how data is transferred between these nodes.
BUS TOPOLOGY
All the devices/nodes are connected sequentially to a single
cable. The cable to which the nodes connect is called a
backbone. If a backbone is broken, the entire segment fails.
STAR TOPOLOGY
All the nodes in the network are connected to a central
connection point, like a hub or switch.
RING TOPOLOGY
A ring network is a network topology in which each nodes
connects to exactly two other nodes, forming a single
continuous pathway for signals through each node – a ring.
TREE TOPOLOGY
A tree topology is a special type of structure in which many
connected elements are arranges like the branches of tree.
MESH TOPOLOGY
Is a type of networking where all nodes cooperate to
distribute data amongst each other. Everything on the
network is connected to everything else and there are
multiple paths to every host. This is how internet works.
Internet Terms and Definition
Host
A computer that is used to transfer data on the Internet.
Web Hosting
To store and make web pages available and ready for inquiries, or a computer
that has a consistent connection to the Internet.
4
Living in IT Era
Domain Name
A domain name is a description or representation of a computer’s location on
the internet. It is usually separated by a dot.
For Example:
www.comentum.com
sales.comentum.com
joespizza.comentum.com
DNS
DNS (Domain Name System) is a large database of domain names and their
correspondent Internet (IP Addresses). For example: www.widget.com
corresponds to its unique number 207.168.6.12
IP Address
An IP (Internet Protocol) address is an unique number used to identify a
computer on the Internet. If you are connected to the Internet, you must have a
unique network number, which is an IP address. An example of an IP address
is:
207.168.6.12
There are four numbers separated by a dot, and are between 0 and 255.
FTP
File Transfer Protocol is a method of transferring files between two computers
on the Internet. To access, upload or download information on a server
computer, FTP software makes the information access or transfer possible.
HOME PAGE
A home Page is the main or index page of a web site.
URL (Uniform Resource Locator)
Is a web address used to connect to a remote resource on the World Wide Web.
SERVER
A server is a computer with a software program set up for serving web pages to
a user on the same computer or another computer. The server computer
coupled with server software listens for inquiries from a client computer.
Lecture 11:
5. Light Side of the Internet
UPLOAD
To upload is to transfer data from your computer to another computer.
DOWLOAD
To download is to transfer data from another computer to your computer.
=======================================================================================
II. The World Wide Web
The World Wide Web is the system that enables you to access hypertext
documents and other file over the internet.
Is referred to as the collection of public websites that are connected to the internet
world wide. The program was designed to make information readily available to
users, and to allow a user to explore relationships between different pages (ie,
clicking to get to a different section of a website).
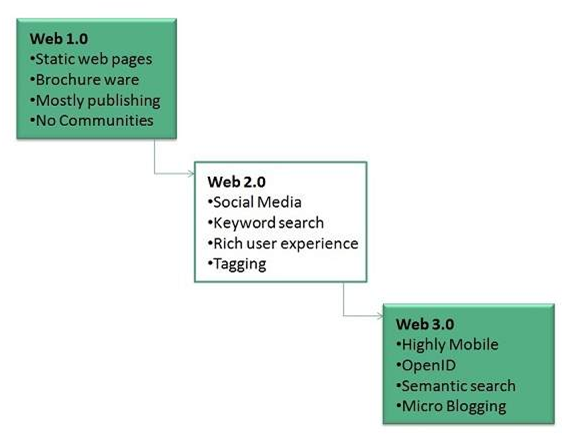
WEB 1.0
Documents are numbered with addresses that should be inputted to retrieve
the file. This is called the web 1.0 or the read-only web, wherein the
information or hypertext file is accessed by the user. There were no facilities
to interact with it other than to read or view the content.
WEB 2.0
The Web 2.0 the read-and-write Web started with the need to interact
disadvantages. Users wanted to e-mail Web sites and interact on social
networking sites. The Web 2.0 enabled users or viewers to edit the content of
the files they were accessing.
WEB 3.0
Today, the Web 3.0 or the semantic executing web is being developed. The
web 3.0 is envisioned to be a smarter access of hypertext files and a version
that would enable a wider range of search in a fast manner.
Web Technologies
The WWW is considered to be one of the applications in the internet and computer
networks. This based on three fundamental technologies that are said to be part of
the WWW development.
6
Living in IT Era
Hypertext Markup Language (HTML)
Is a standard markup language used for creating web page. HTML is classified
as the set of markup symbols or codes appended in a file intended for
presentation on a World Wide Web browser page.
Hypertext Transfer Protocol (HTTP)
Is a classified as the set of standards allowing users of the World Wide Web to
interchange information seen on web pages.
Web Servers and Web Browser
Is a software application for recovering, presenting, and navigating information
resources on the World Wide Web. There are different browser applications that
are currently used in the WWW such as Microsoft Edge, Google Chrome,
Internet Explorer, Mozilla Firefox, Safari and more.
Web Accessibility
Web accessibility means that websites, tools, and technologies are designed and
developed so that people with disabilities can use them. More specifically, people
can:
perceive, understand, navigate, and interact with the Web
contribute to the Web
Web accessibility encompasses all disabilities that affect access to the Web, including:
auditory
cognitive
neurological
physical
speech
visual
Web accessibility also benefits people without disabilities, for example:
people using mobile phones, smart watches, smart TVs, and other devices with
small screens, different input modes, etc.
older people with changing abilities due to ageing
people with “temporary disabilities” such as a broken arm or lost glasses
7
Living in IT Era
people with “situational limitations” such as in bright sunlight or in an environment
where they cannot listen to audio
people using a slow Internet connection, or who have limited or expensive
bandwidth
Research and Information Seeking
Web Search Engine
These are programs designed to search or mine the World Wide Web based on
keywords provided by the user. They return results such as Websites, files,
photos, or media files. Examples of these are Bing, Duckduckgo, Google, and
Yahoo.
Research Indexing Sites
These are Websites dedicated to compile and index researches done by
academic researchers, engineers, social scientist and so on. Examples are
IEEE, Xplore, Google Scholar, and ResearchGate.
Massive Online Open Course (MOOC) sites or tutorial sites
These are Websites dedicated to teach and inform focused on different areas.
The delivery of information is similar to a classroom lecture setup, wherein
lectures and assignments are delivered and submitted, respectively, online.
Examples are Coursera, edX, and Udemy.
Employment Websites
These are Websites that enable companies to post job vacancies and also
accommodate job seekers by providing a resume-submission facility. Examples
are Jobstreet, JobsDB, and Bestjobs.
Electronic Commerce (e-commerce)
This is a technology that uses electronic means to trade products and
currencies. It also includes any technology that introduces ease in business
management and customer convenience.
Lecture 12:
Creating the best slide presentation
Getting started with your presentation
Google Slides allows you to create dynamic slide presentations. These presentations can include animation, narration, images, videos, and much more. In this lesson, you’ll learn about the Google Slides interface and the basics of setting up your document, including the menu and shortcut toolbars, zoom settings, and choosing a theme.
The Google Slides interface
When you create a new presentation in Google Slides, the interface for Slides will appear. This interface displays the toolbar, along with the main view of your presentation.It allows you to create and modify slides, choose a theme, and share the presentation with others.
Click the buttons in the interactive below to learn about the interface for Google Slides.

Choosing a theme
When you first create a new presentation, Google Slides will prompt you to choose a theme. Themes give you a quick and easy way to change the overall design of your presentation. Each theme has a unique combination of colors, fonts, and slide layouts. Select a theme from the panel on the right side of the window, and it will be applied to your entire presentation.

You can choose from a variety of new themes at any time, giving your entire presentation a consistent, professional look. If you want to change your theme, you can open the Themes panel again by clicking the Theme command on the shortcut toolbar.

Working with the Google Slides environment
Here, we’ll show you how to navigate the Google Slides environment. You’ll learn how to use the menu and shortcut toolbars, zoom in and out, and play your presentation.
The menu and shortcut toolbars
The Google Slides interface uses a traditional menu system with a shortcut toolbar. The menus contain commands grouped by function. The shortcut toolbar has buttons for some frequently used commands.

Showing and hiding the menus
You can choose to minimize the menu bar to free up more space to display your slides. Click the Hide the menus command to hide the menu bar, leaving only the shortcut toolbar at the top of the window. Click it again to show the menu bar again.

Zooming in and out
You can zoom in and out of your presentation with the Zoom shortcut. Click Zoom on the shortcut toolbar, then move the mouse cursor over your slide. The cursor will change to a magnifying class with a plus sign inside of it. Now you can left-click to zoom in or right-click to zoom out. Press Escape on your keyboard to return your cursor to normal.

Within the View drop-down menu, hover over Zoom and there you will see options to set the zoom more precisely.

Playing the presentation
When you are ready to show your presentation—or if you want to see what it will look like during a presentation—click the Present button to the right of the menus. You can also click the drop-down arrow for additional presentation options.

Lecture 13:
Slide basics
Every Google Slides presentation is composed of a series of slides. To begin creating a slide show, you’ll need to know the basics of working with slides. You’ll need to feel comfortable with tasks such as inserting a new slide, changing the layout of a slide, and arranging existing slides.
Understanding slides and slide layouts
When you insert a new slide, it will usually have placeholders to show you where text will be placed. Slides have different layouts for placeholders, depending on the type of information you want to include. Whenever you create a new slide, you’ll need to choose a slide layout that fits your content.

Creating a slide and selecting a layout
Whenever you start a new presentation, it will contain one slide with the Title Slide layout. You can insert as many slides as you need from a variety of layouts.
- Click the drop-down arrow next to the New slide command.
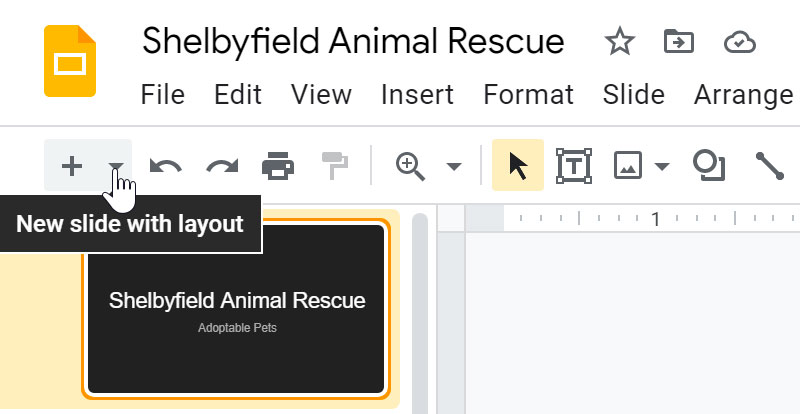
- Choose the desired slide layout from the drop-down menu that appears.
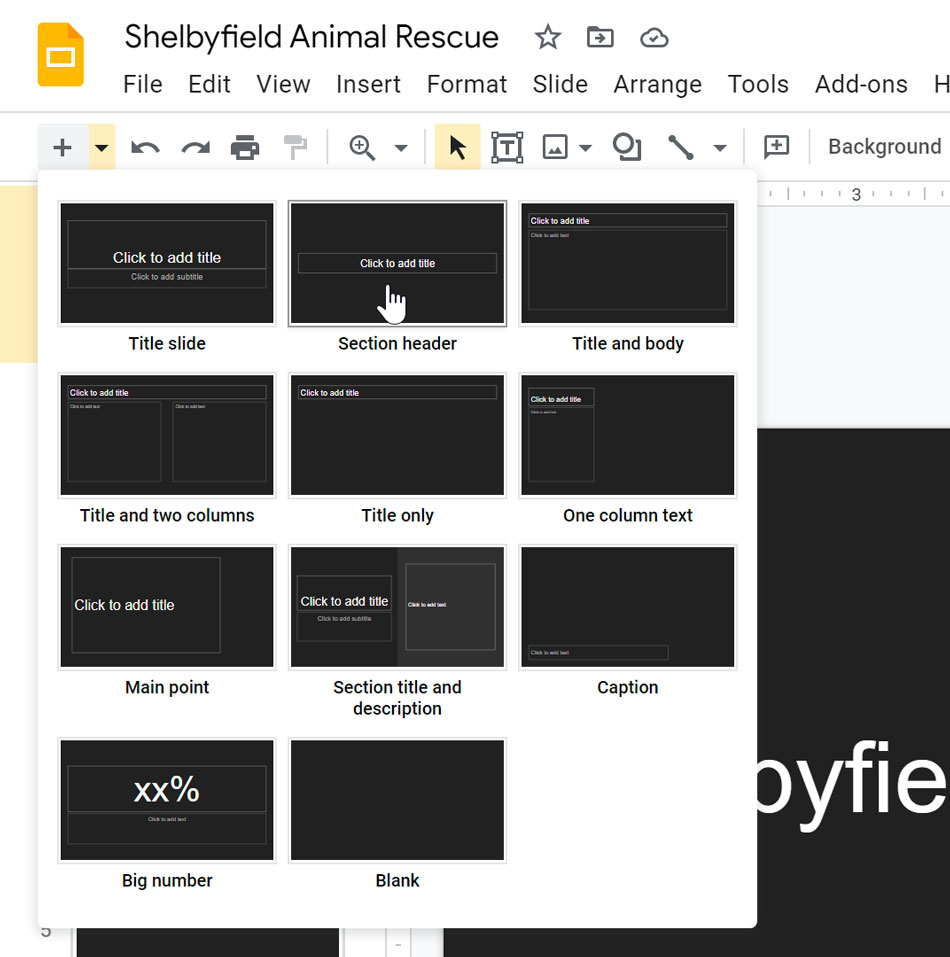
- The new slide will appear.
To change the layout of an existing slide, click the Layout command, then choose the desired layout.

To quickly add a slide that uses the same layout as the selected slide, click the New slide command.

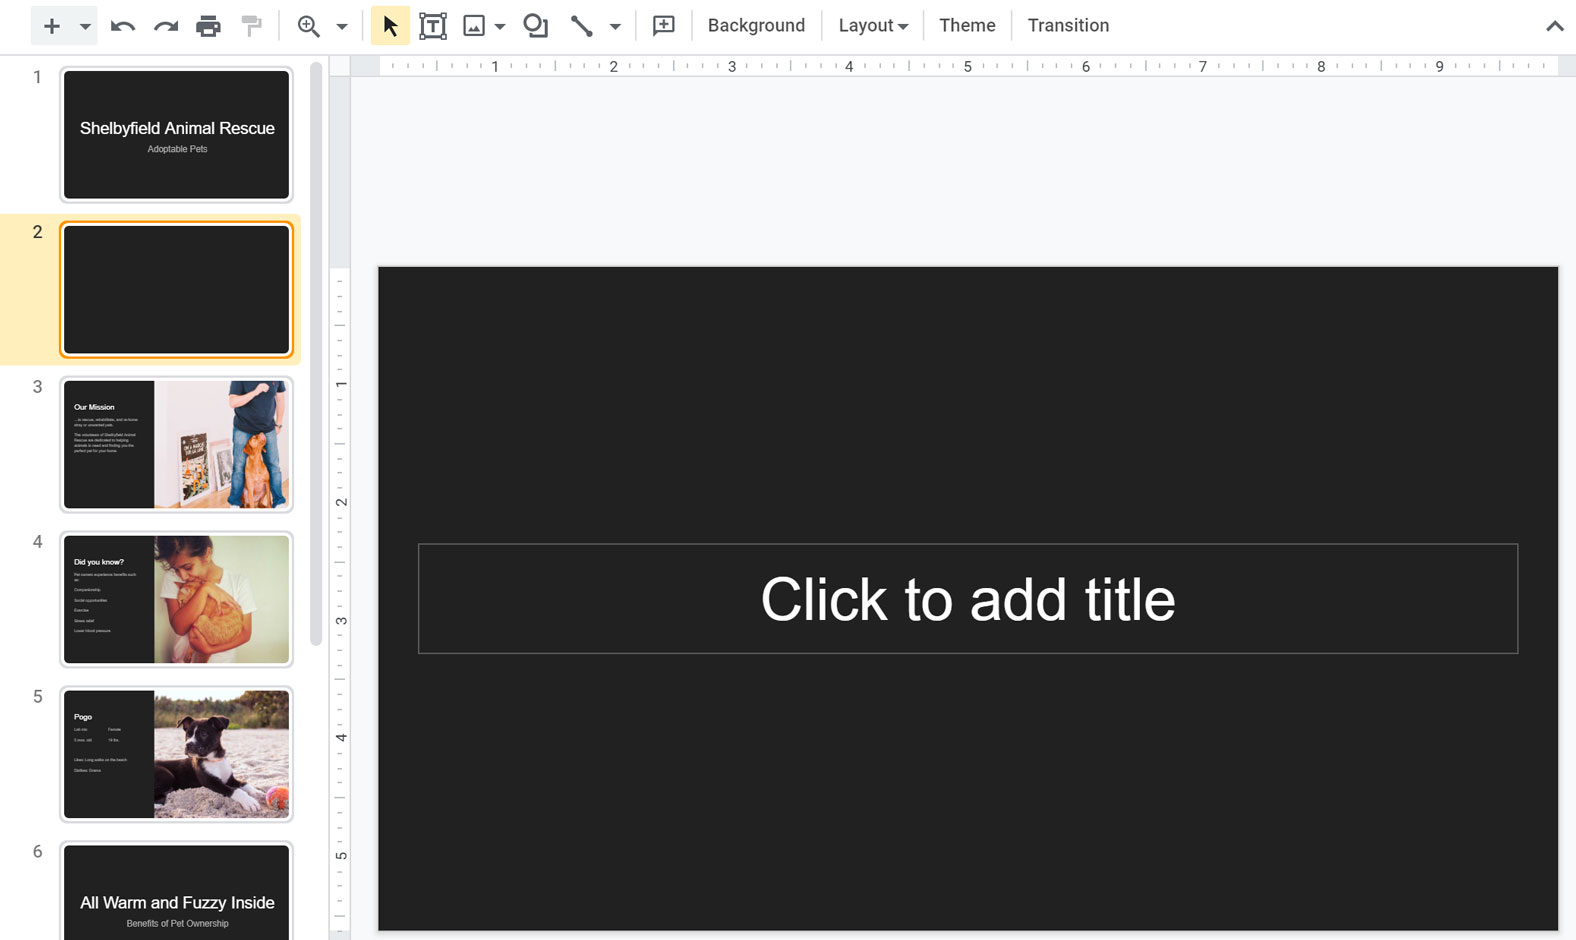
Organizing slides
Google Slides presentations can contain as many slides as you need. The Slide Navigation pane on the left side of the screen makes it easy to organize your slides. From there, you can duplicate, rearrange, and delete slides in your presentation.
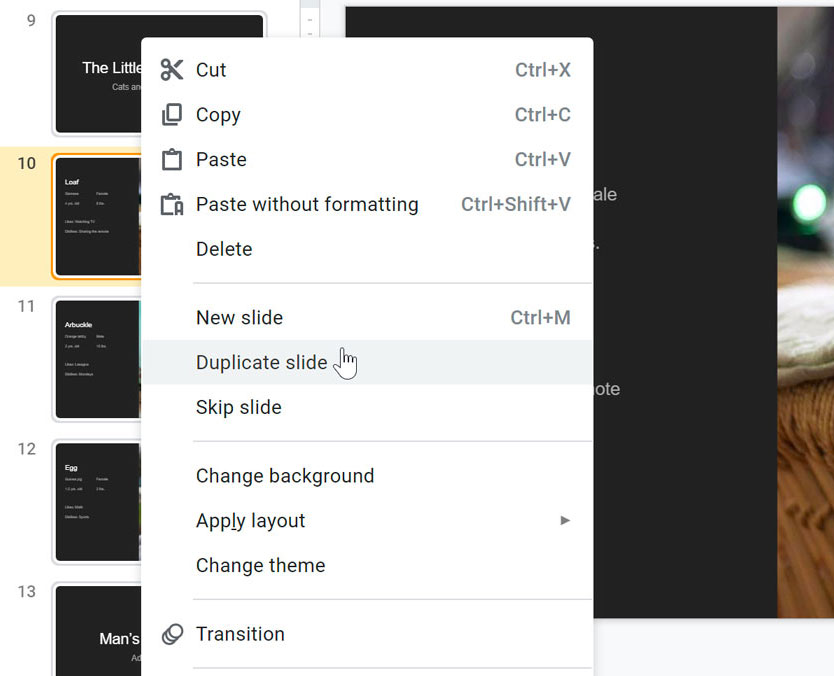
- Duplicate slides: If you want to copy and paste a slide quickly, you can duplicate it. To duplicate slides, select the slide you want to duplicate, right-click the mouse, and choose Duplicate slide from the menu that appears. You can also duplicate multiple slides at once by selecting them first.
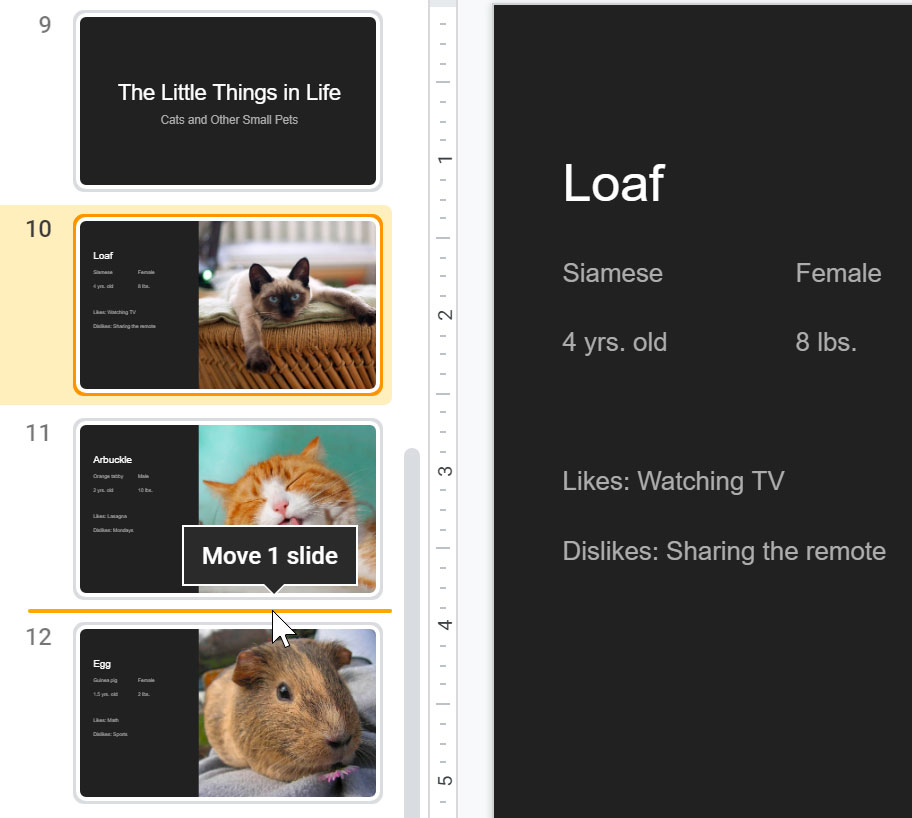
- Move slides: It’s easy to change the order of your slides. Just click and drag the desired slide in the Slide Navigation pane to the desired position.
- Delete slides:If you want to remove a slide from your presentation, you can delete it. Simply select the slide you want to delete, then press the Delete or Backspace key on your keyboard.
Customizing slide layouts
Sometimes you may find that a slide layout doesn’t exactly fit your needs. For example, a layout might have too many—or too few—placeholders. You might also want to change how the placeholders are arranged on the slide. Fortunately, Google Slides makes it easy to adjust slide layouts as needed.
Adjusting placeholders
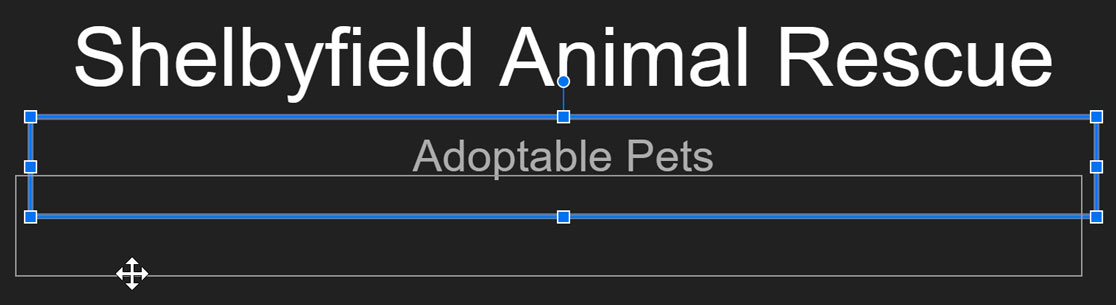
- To select a placeholder:Hover the mouse over the edge of the placeholder and click (you may need to click the text in the placeholder first to see the border).
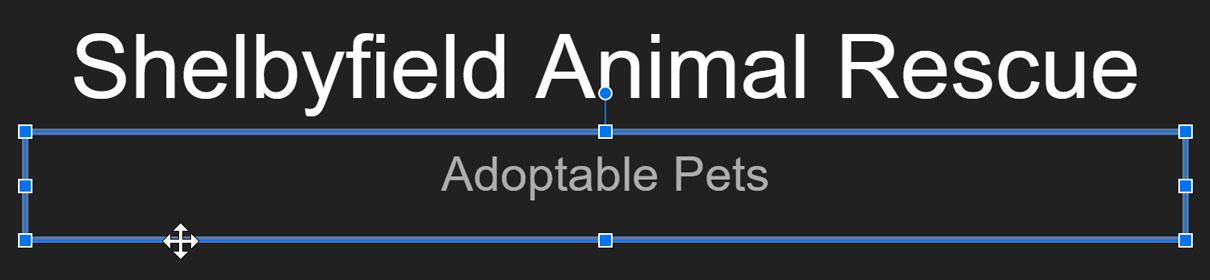
- To move a placeholder:Select the placeholder, then click and drag it to the desired location.
- To resize a placeholder:Select the placeholder you want to resize. Sizing handles will appear. Click and drag the sizing handles until the placeholder is the desired size. You can use the corner sizing handles to change the placeholder’s height and width at the same time.
- To delete a placeholder:Select the placeholder you want to delete, then press the Delete or Backspace key on your keyboard.
Using blank slides
If you want even more control over your content, you may prefer to use a blank slide, which contains no placeholders. Blank slides can be customized by adding your own text boxes, pictures, charts, and more.
- To insert a blank slide, click the drop-down arrow next to the New slide command, then choose Blank from the menu that appears.
While blank slides offer more flexibility, keep in mind that you won’t be able to take advantage of the pre-designed layouts included in each theme.
Changing the theme
You can quickly alter the layout and color palette of all of your slides by changing the theme of the presentation. The theme can be changed at any time.
- Click the Theme command on the shortcut toolbar.

- The Themes pane will appear. Select the desired theme.
- The theme will be applied to the entire presentation.
To select a different background color for your slides, open the Slide menu and click Change background, then select a new color. If you select a color from the Theme palette, it will change when you select a different theme. The other colors will remain the same in any theme.

Be aware that if you have moved or resized a placeholder, it won’t change with the theme. To fix this, you can reapply the slide’s original layout in the Layout menu.

Playing your presentation
Once you’ve arranged your slides, you may want to play your presentation. This is how you will present your slide show to an audience.
- Click the Present button to the right of the menus. You can also click the drop-down arrow for additional presentation options.

- The presentation will appear in a maximized window. A navigation bar in the lower-left corner provides you with several options for displaying your presentation.

- You can advance to the next slide by clicking your mouse or pressing the spacebar on your keyboard. You can also use the arrow keys on your keyboard to move forward or backward through the presentation.
- Press the Esc key to exit presentation mode.
Lecture 14:
Understanding slides and slide layouts
When you insert a new slide, it will usually have placeholders to show you where text will be placed. Slides have different layouts for placeholders, depending on the type of information you want to include. Whenever you create a new slide, you’ll need to choose a slide layout that fits your content.
Creating a slide and selecting a layout
Whenever you start a new presentation, it will contain one slide with the Title Slide layout. You can insert as many slides as you need from a variety of layouts.
- Click the drop-down arrow next to the New slide command.
- Choose the desired slide layout from the drop-down menu that appears.
- The new slide will appear.
To change the layout of an existing slide, click the Layout command, then choose the desired layout.
To quickly add a slide that uses the same layout as the selected slide, click the New slide command.
Organizing slides
Google Slides presentations can contain as many slides as you need. The Slide Navigation pane on the left side of the screen makes it easy to organize your slides. From there, you can duplicate, rearrange, and delete slides in your presentation.
- Duplicate slides: If you want to copy and paste a slide quickly, you can duplicate it. To duplicate slides, select the slide you want to duplicate, right-click the mouse, and choose Duplicate slide from the menu that appears. You can also duplicate multiple slides at once by selecting them first.
- Move slides: It’s easy to change the order of your slides. Just click and drag the desired slide in the Slide Navigation pane to the desired position.
- Delete slides:If you want to remove a slide from your presentation, you can delete it. Simply select the slide you want to delete, then press the Delete or Backspace key on your keyboard.
Customizing slide layouts
Sometimes you may find that a slide layout doesn’t exactly fit your needs. For example, a layout might have too many—or too few—placeholders. You might also want to change how the placeholders are arranged on the slide. Fortunately, Google Slides makes it easy to adjust slide layouts as needed.
Adjusting placeholders
- To select a placeholder:Hover the mouse over the edge of the placeholder and click (you may need to click the text in the placeholder first to see the border).
- To move a placeholder:Select the placeholder, then click and drag it to the desired location.
- To resize a placeholder:Select the placeholder you want to resize. Sizing handles will appear. Click and drag the sizing handles until the placeholder is the desired size. You can use the corner sizing handles to change the placeholder’s height and width at the same time.
- To delete a placeholder:Select the placeholder you want to delete, then press the Delete or Backspace key on your keyboard.
Using blank slides
If you want even more control over your content, you may prefer to use a blank slide, which contains no placeholders. Blank slides can be customized by adding your own text boxes, pictures, charts, and more.
- To insert a blank slide, click the drop-down arrow next to the New slide command, then choose Blank from the menu that appears.
While blank slides offer more flexibility, keep in mind that you won’t be able to take advantage of the pre-designed layouts included in each theme.
Changing the theme
You can quickly alter the layout and color palette of all of your slides by changing the theme of the presentation. The theme can be changed at any time.
- Click the Theme command on the shortcut toolbar.
- The Themes pane will appear. Select the desired theme.
- The theme will be applied to the entire presentation.
To select a different background color for your slides, open the Slide menu and click Change background, then select a new color. If you select a color from the Theme palette, it will change when you select a different theme. The other colors will remain the same in any theme.
Be aware that if you have moved or resized a placeholder, it won’t change with the theme. To fix this, you can reapply the slide’s original layout in the Layout menu.
Playing your presentation
Once you’ve arranged your slides, you may want to play your presentation. This is how you will present your slide show to an audience.
- Click the Present button to the right of the menus. You can also click the drop-down arrow for additional presentation options.
- The presentation will appear in a maximized window. A navigation bar in the lower-left corner provides you with several options for displaying your presentation.
- You can advance to the next slide by clicking your mouse or pressing the spacebar on your keyboard. You can also use the arrow keys on your keyboard to move forward or backward through the presentation.
- Press the Esc key to exit presentation mode.
Lecture 15:
Adding pictures and shapes
Adding pictures and shapes can make your presentations more interesting and engaging. The picture and shape tools in Google Slides also let you customize your images by cropping, reordering, changing colors, and adding other formatting.
Inserting pictures
You can insert a picture from a file on your computer onto any slide. Google Slides even includes tools for finding online pictures and adding screenshots to your presentation.
To insert a picture:
- Open the Insert menu, then select Image.
- You can choose an image from a number of sources. In our example, we’ll Search the web.
- The Google images search pane will appear on the right. Enter your search terms to find an image you’re interested in.
- Click the desired image, then click Insert.
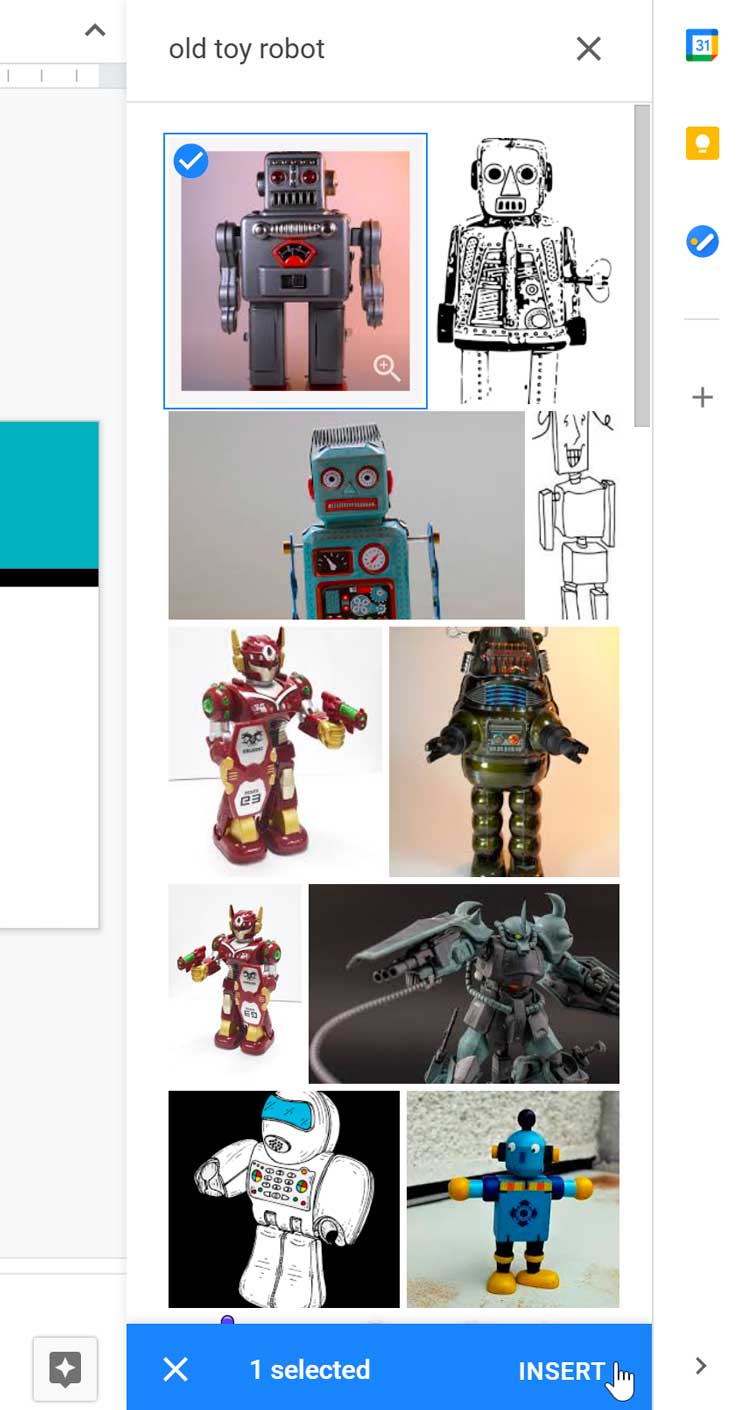
- The image will appear on the selected slide.
Formatting pictures
There are a variety of ways to format the pictures in your slide show. Google Slides has tools to resize and rotate the picture, crop the picture, adjust the image, and more.
To crop an image:
- Select the image you’d like to crop, then click the Crop command.
- Cropping handles will appear around the image. Click and drag one of the handles to crop the image. Make sure the mouse is right over the black cropping handle so you don’t accidentally select a resizing handle.
- Click the Crop command again. The image will be cropped.
To crop an image to a shape:
- Select the image you want to crop, then click the Mask Image drop-down arrow next to the Crop command. From the drop-down menu, hover over acategory; then, choose the desired shape that you want to insert.
- The image will appear formatted as the shape.
After cropping the image to a shape, you can click the crop button again to use the cropping handles and adjust the size and proportions of the shape.
Image options
You can adjust an image’s transparency, brightness, contrast, and more. To do this, select the image, then click Format options on the toolbar or in the Format menu. The Format options pane will open.

Moving and resizing pictures
- To move an image: Select the image, then drag it to the desired location.
- To resize an image: Select the image you want to resize. Sizing handles will appear. Click and drag the sizing handles until the image is the desired size. You can use the corner sizing handles to change the image’s height and width at the same time.
- To rotate an image: When the image is selected, click and drag the rotation handle above the image.

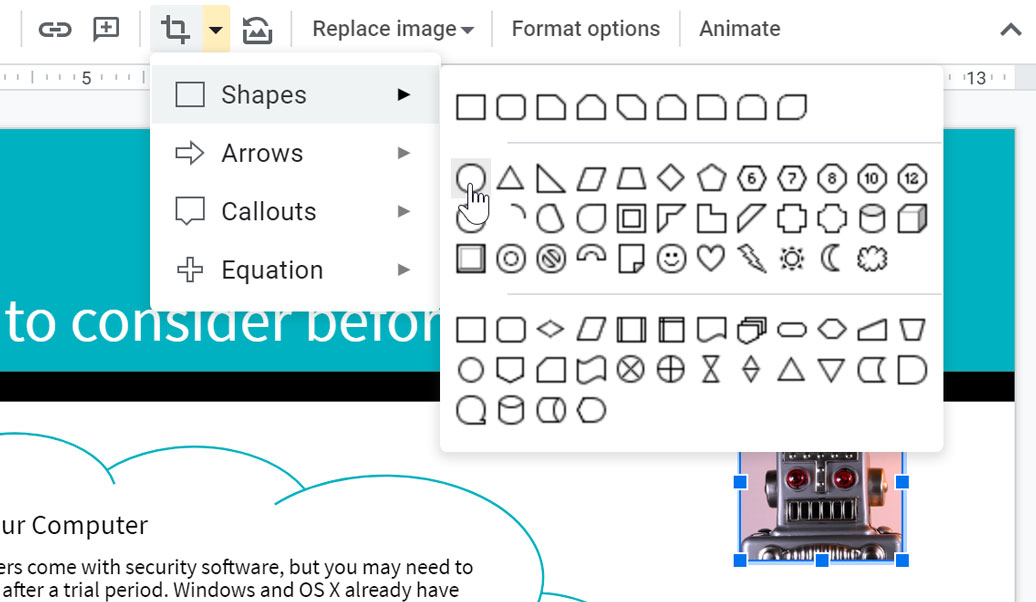
Inserting shapes
Shapes are a great way to make your presentation more interesting. Google Slides gives you a lot of different shapes to choose from, and they can be customized to suit your needs, allowing you to use your own color palette, preferences, and more.
To insert a shape:
- Click the Shape command on the toolbar to open the drop-down menu. Hover over one of the categories, then choose a shape.
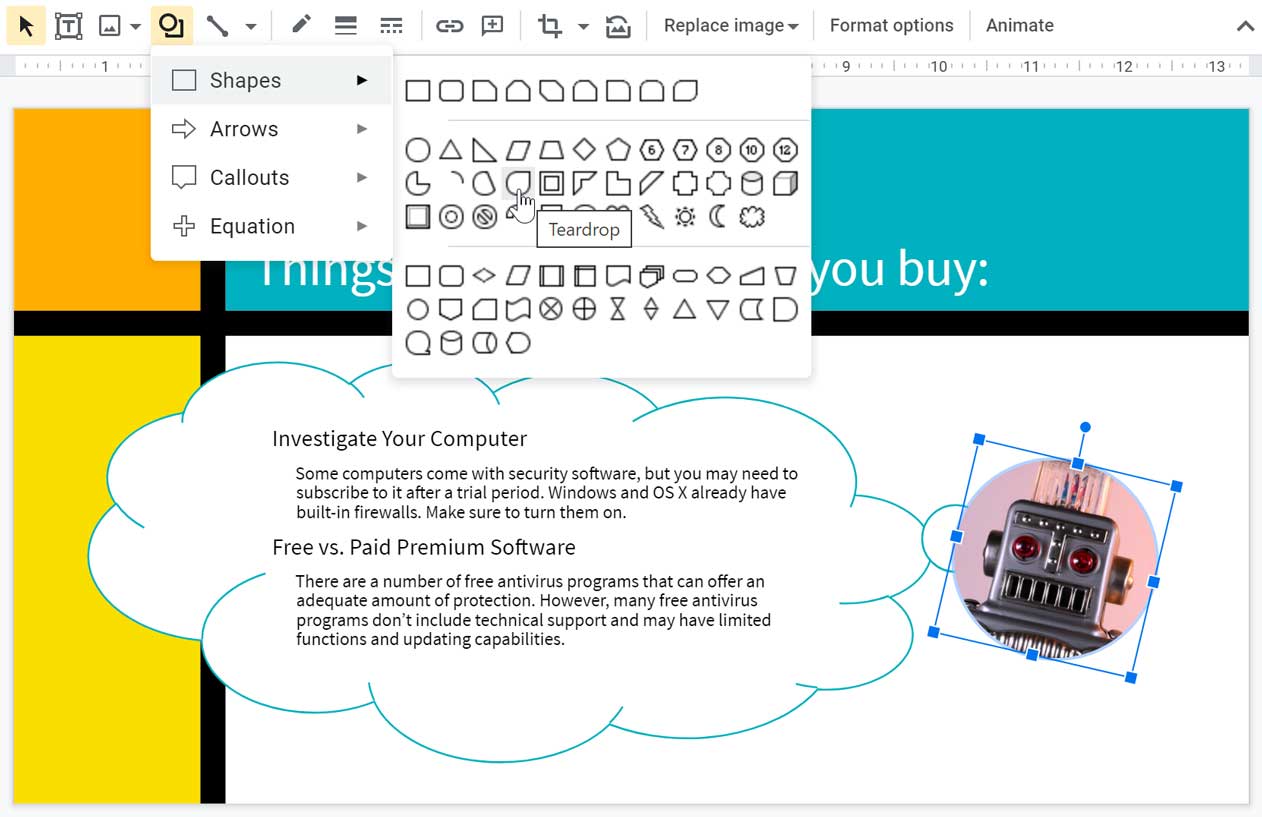
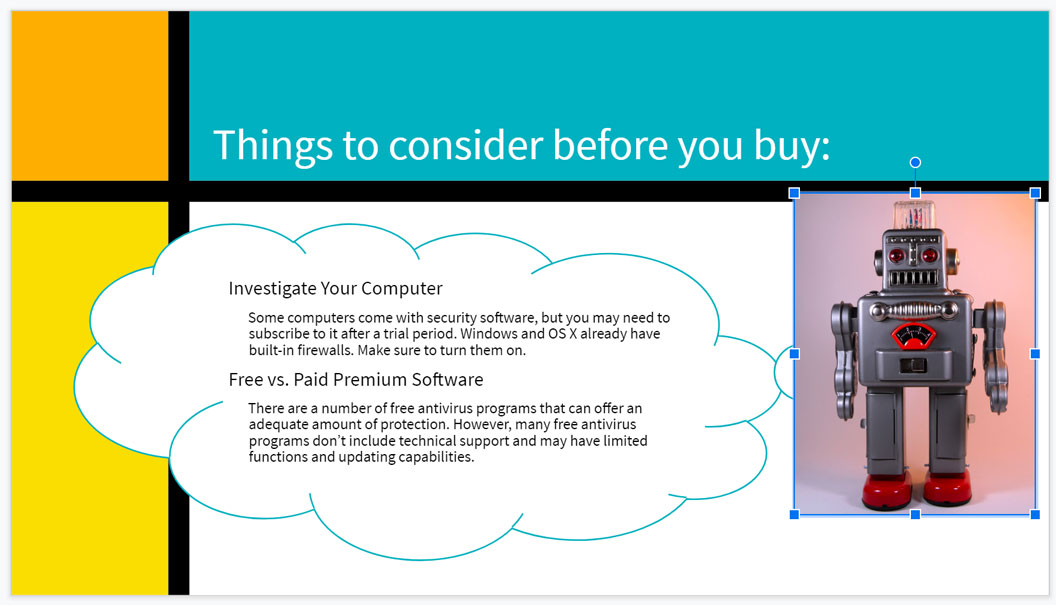
- Click and drag in the desired location to add the shape to the slide. In our example, we’ll draw the shape on top of the robot image for now.
- The shape will appear on the slide.
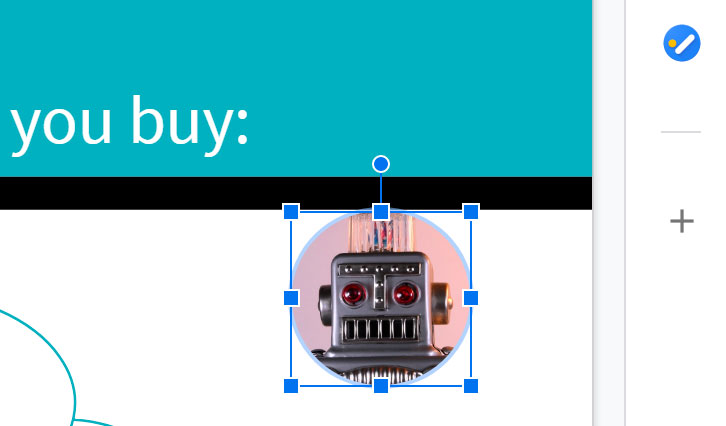
Formatting shapes
In Google Slides, you can modify shapes in a variety of ways to suit your needs. Shapes can be moved and resized just like images, and they have a few other options for adjustment.
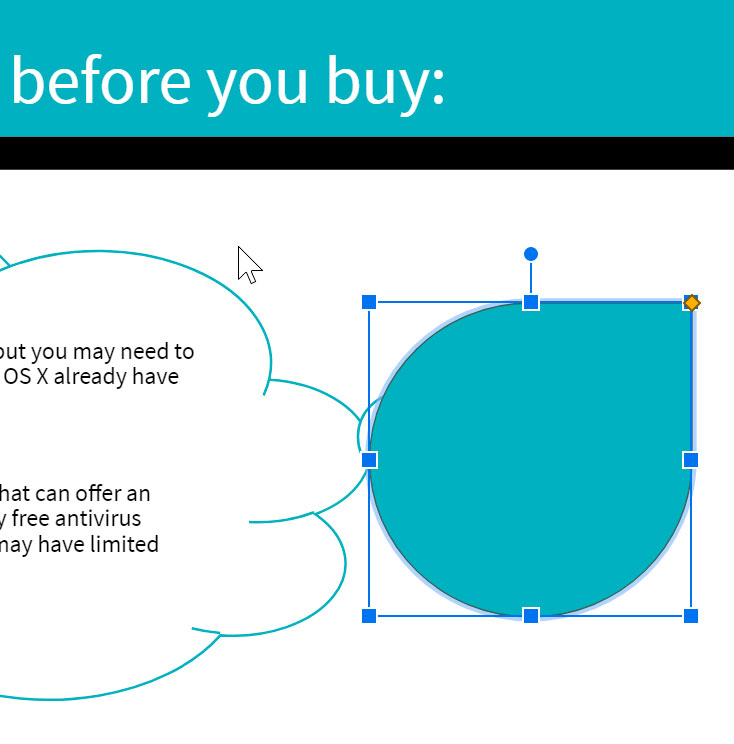
Some shapes have the option to change their dimensions and proportions. To adjust the proportion of a shape, select it, then click and drag the diamond handle.

You can further customize shapes by changing their fill color, line color, line weight, and line dash. Select a shape, then click one of the four shape format commands to see the menu for that option.

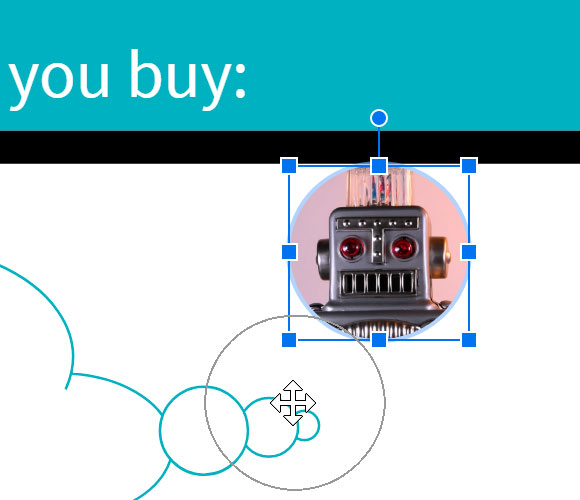
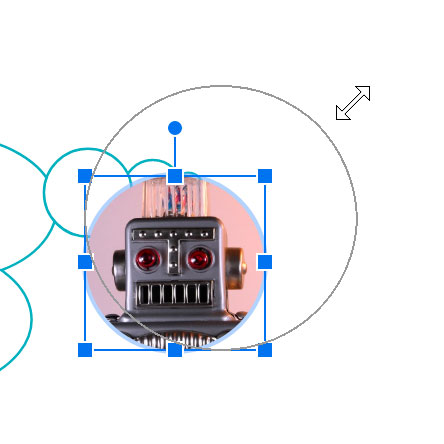
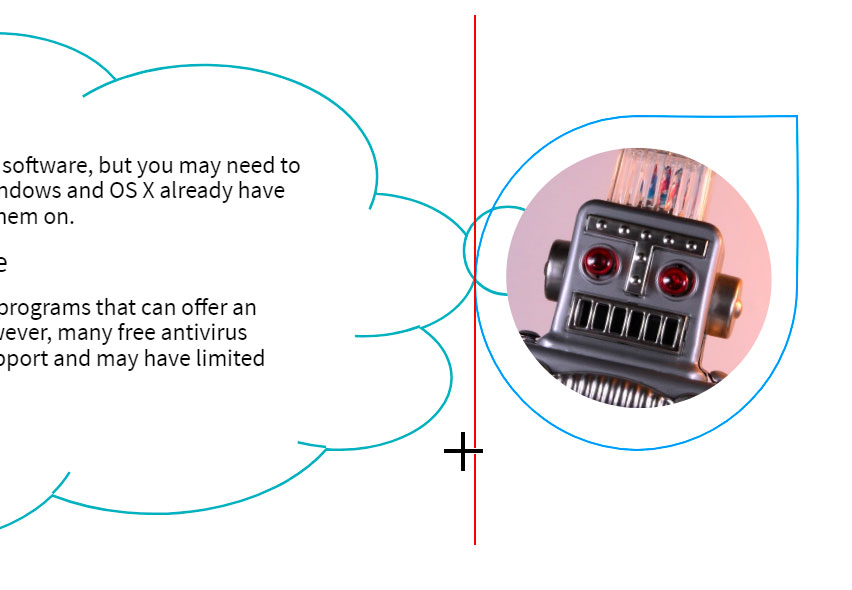
Reordering objects
In Google Slides, each slide may have multiple items, such as pictures, shapes, and text boxes. When objects are inserted into a slide, they are placed on levels according to the order in which they were inserted into the slide.
In our example, we drew a teardrop shape on the top level, obscuring the robot picture behind it. We can reorder it to put it behind the other objects.
To reorder an object:
- Select the object you want to reorder.
- Open the Arrange menu, select Order, then choose how you’d like to reorder the object. In our example, we’ll select Send to back.
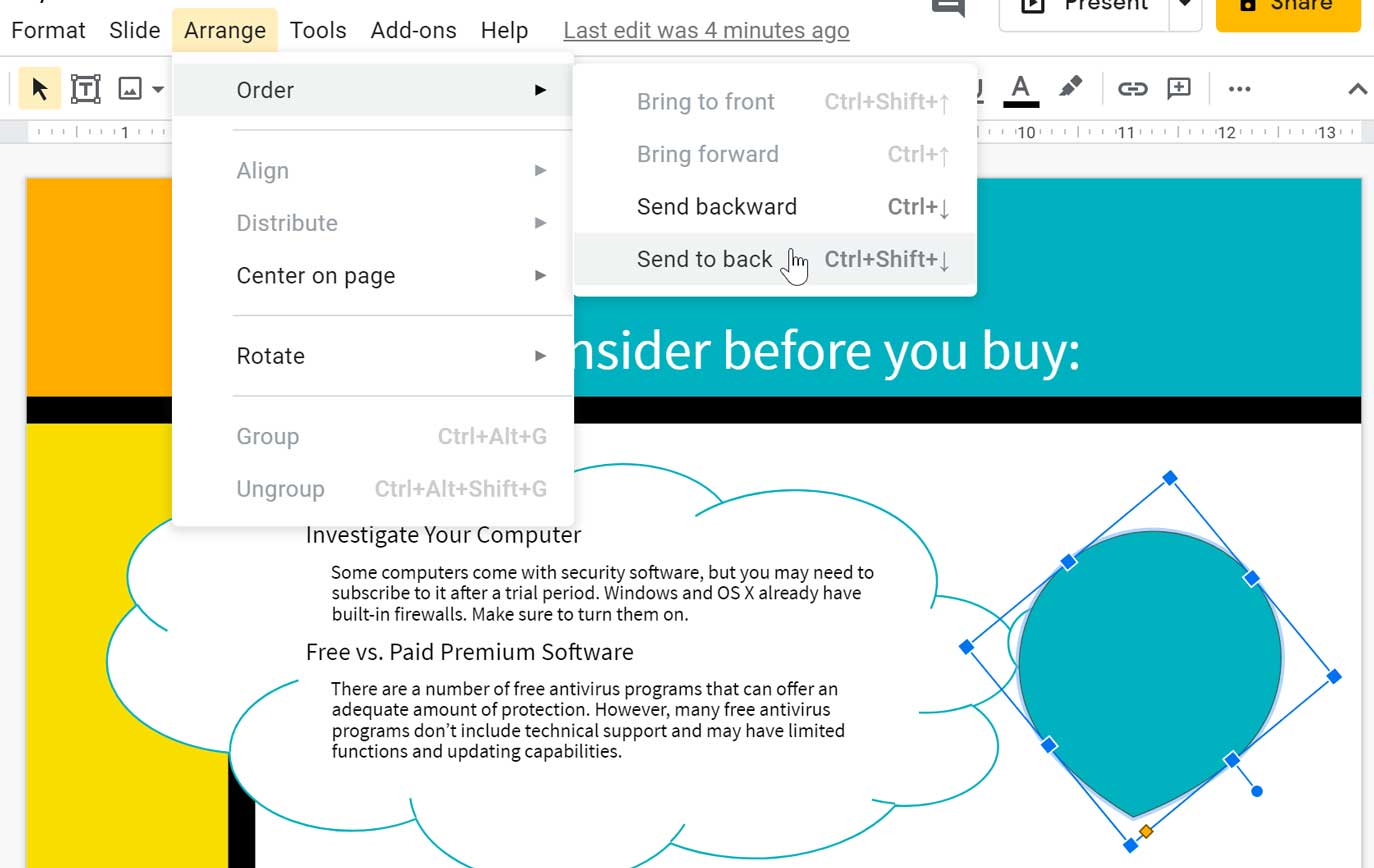
- The object will reorder. In our example, the shape is a nice background for the robot image.
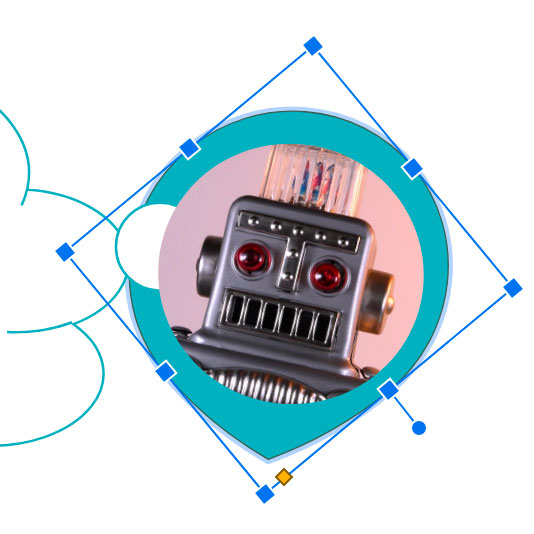
You can arrange multiple overlapping objects using the Order commands. In our example, we selected the robot image and used the Send backward command. The robot image is behind the cloud, but in front of the teardrop shape.

Lecture 16:
Adding transitions and animations
Presentations don’t have to be a series of static slides. You can add animations to objects on slides or transitions to entire slides. A transition can be as simple as fading to the next slide, or it can be a more flashy effect. Any object can be animated, making it move or fade in or out of the slide. Google Slides makes it easy to apply these effects to some or all of your slides, adding emphasis or polish to your presentation.
Watch the video below to learn how to add transitions.https://www.youtube.com/embed/dhiXvvqCAJI?rel=0&showinfo=0
Google Slides has one pane to manage all of your transitions and animations. The Motion pane will allow you to configure the transition and all animations for the current slide.

Transitions and animations are best used in moderation. Adding too many of these effects can make your presentation look a little silly and can even be distracting to your audience. Consider using mostly subtle transitions and animations—or not using them at all.
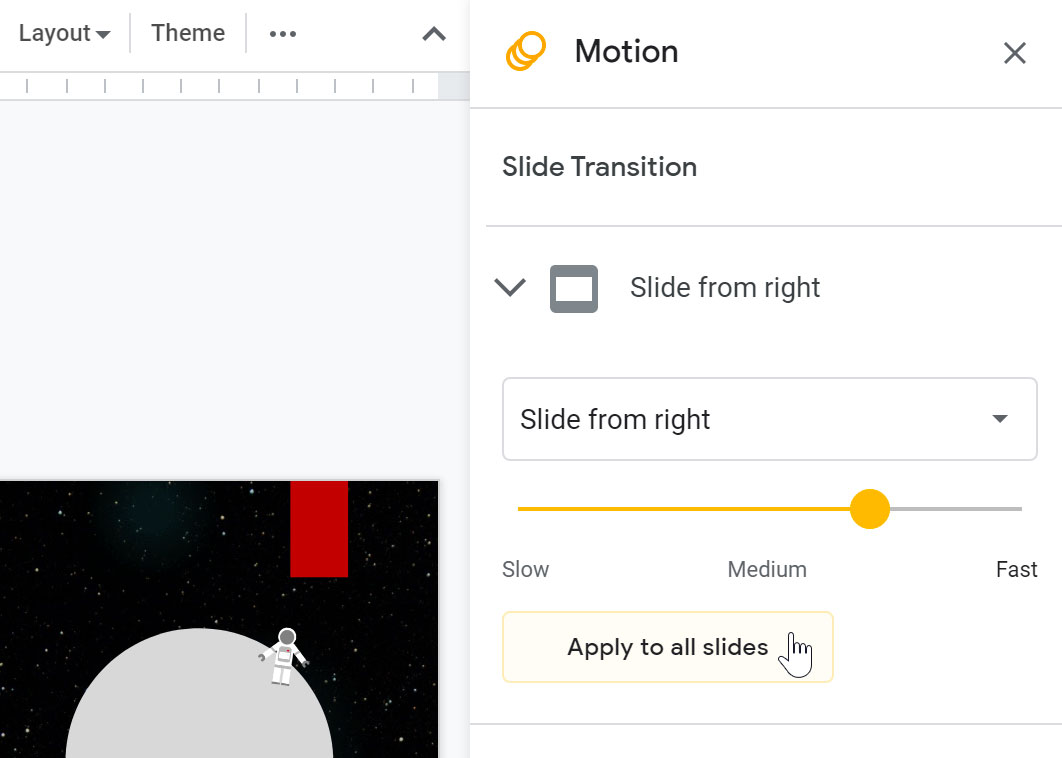
To add a transition:
- Select the desired slide, then click the Transition command on the toolbar.

- The Motion pane will appear. Underneath Slide Transition, open the drop-down menu; then, select a transition.
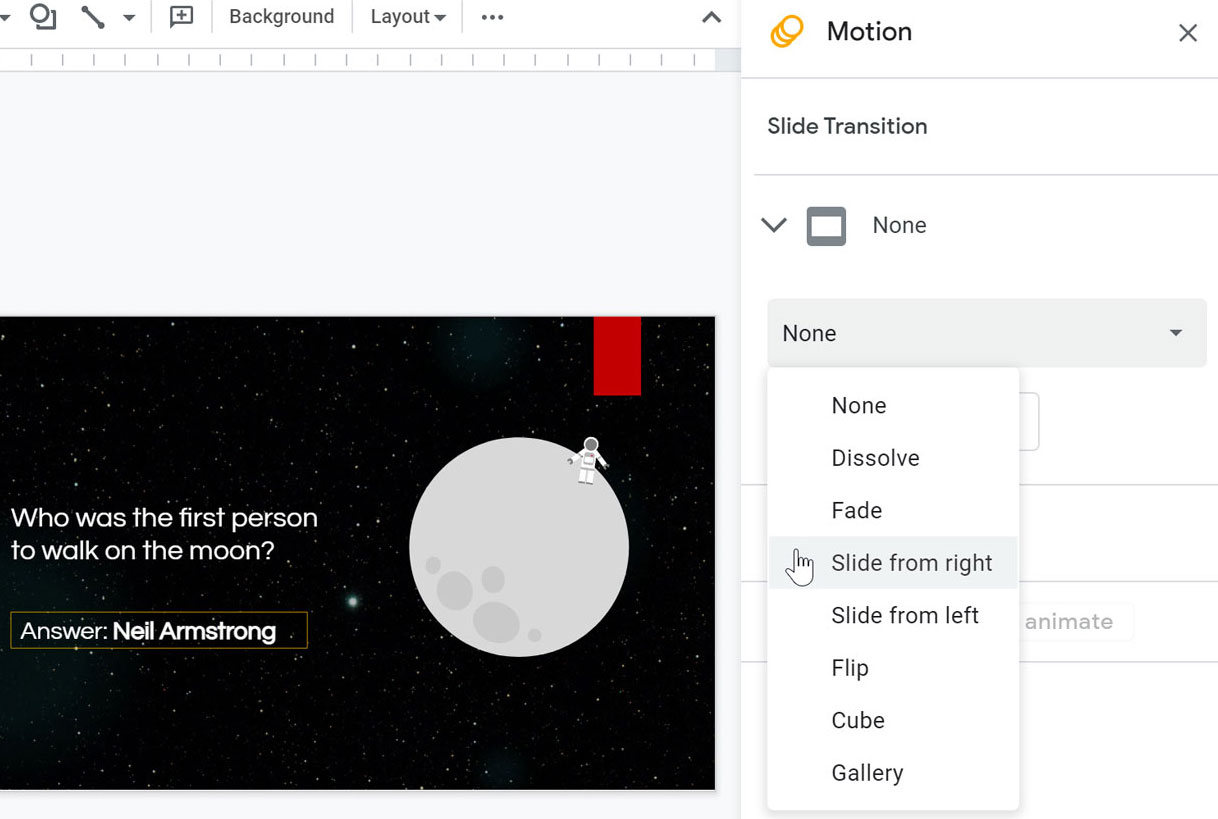
- The transition will be applied to the current slide. You also can adjust the speed of the transition or apply the same transition to all slides.
To add an animation:
- Right-click the desired object, then select Animate.
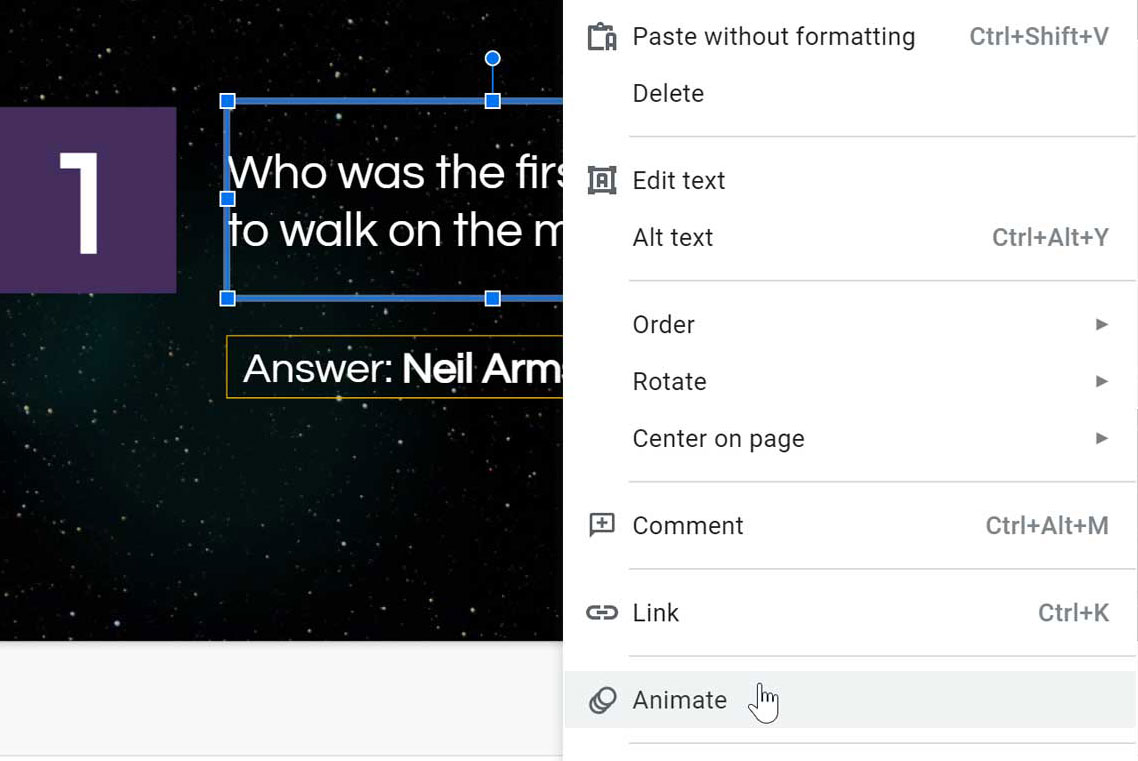
- The Motion pane will appear. Underneath Object Animations, a default animation will be added to the selected object and displayed in the pane.
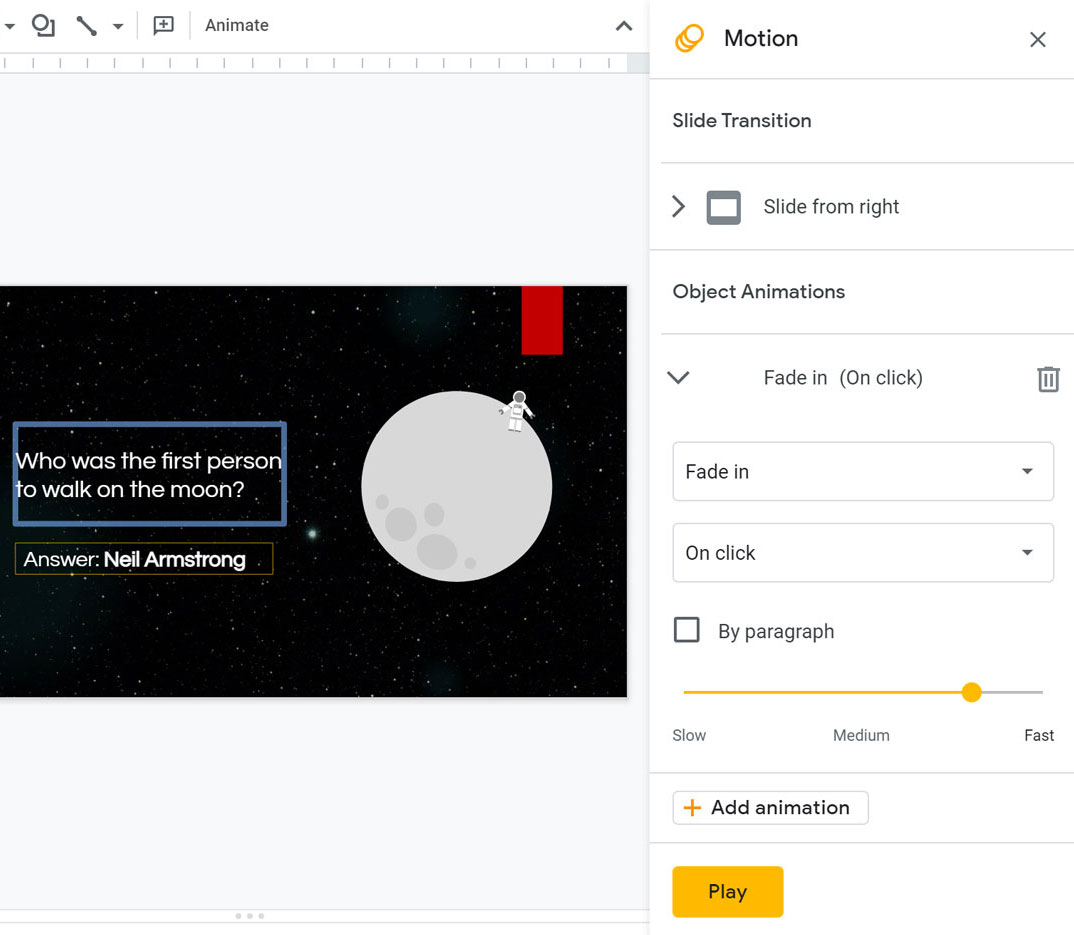
- Open the drop-down menu and select the desired animation.
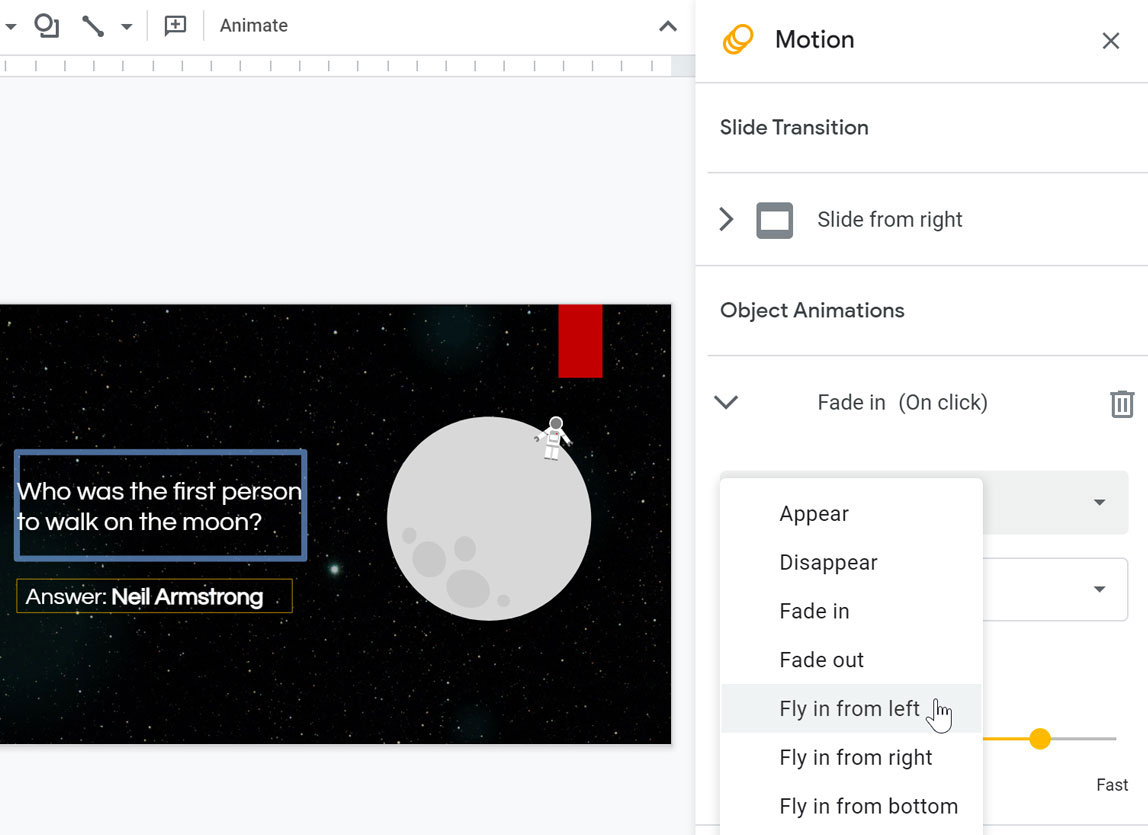
If the Motion pane is already open and you want to add more animations, you can select an object and click Add animation. You can also add multiple animations to one object.

Watch the video below to learn more about using animations.https://www.youtube.com/embed/H2zAx21LxOY?rel=0&showinfo=0
Animation options
By default, an effect starts playing when you click the mouse during a slide show. If you have multiple effects, you will need to click multiple times to start each effect individually. However, by changing the start option for each effect, you can have effects that automatically play after the previous effect or with the previous effect.

If the object is a placeholder or text box, the By paragraph check box will be displayed. It determines if the animation is applied to the entire box or if it animates each paragraph of text in the box one at a time.

You can also adjust the speed of the animation by dragging the animation speed slider.

Presenting your slide show
Once your slide show is complete, you’ll need to learn how to present it to an audience. If you learn how to navigate the slide show and rehearse ahead of time, you can make your presentation smooth, engaging, and professional.
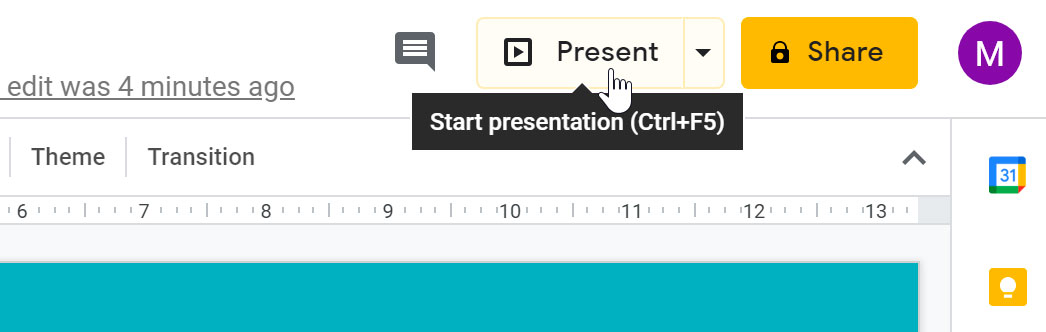
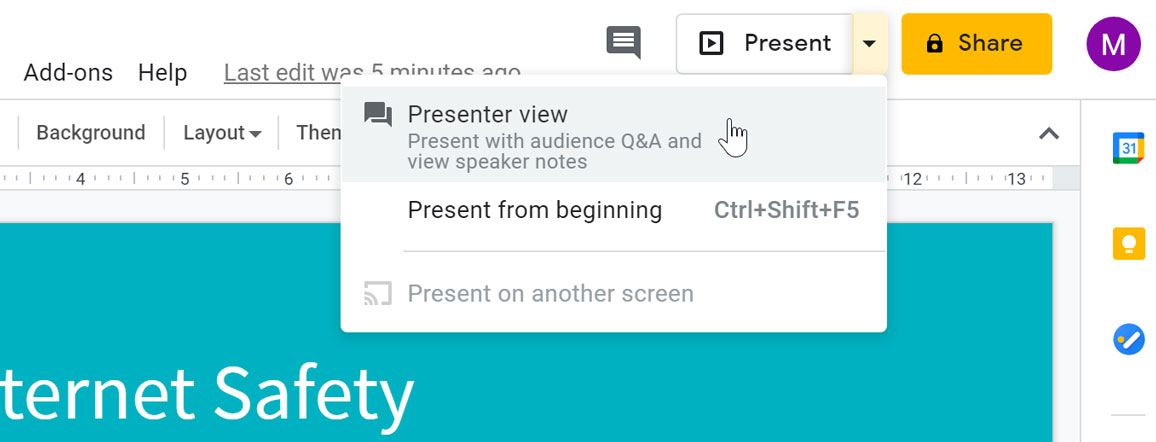
To start a slide show:
There are several ways you can begin your presentation:
- Click the Present command at the top of the window to begin the presentation with the current slide.
- Select Present from beginning in the drop-down menu to begin the presentation from the first slide.

- Select Presenter view in the drop-down menu to start the slide show with Presenter view open. This is a window only visible to you that displays tools to help you with your presentation, like slide previews, notes, and running time.
Navigating the presentation
You can advance to the next slide by clicking your mouse or pressing the spacebar on your keyboard. You can also use the arrow keys on your keyboard to move forward or backward through the presentation. You can also hover your mouse over the bottom-left and use the commands there to navigate the presentation.

Tips for presenting
Before presenting your slide show, think about any preparations you need to make, like setting up the necessary equipment and rehearsing your presentation. Being prepared can help your presentation become more engaging and professional.
- Review your presentation to catch any errors, and rehearse how you will present it. Don’t just read from the slides, but use them to highlight your main points.
- Think about the type of equipment that will be available for your presentation. If you will be using a projector or a network connection, ensure they are set up and connected before your presentation begins.
- If you are presenting with notes, make sure they are only visible to you. If the monitor settings have a mirroring option, you may need to disable it.
Lecture 17:
6. Policing the Internet
Living in IT Era
III. Android Mobile Operating System
ANDROID
Is a Linux based operating system it is designed primarily for touch screen mobile devices
such as smart phones and tablet computers. The android is a powerful operating system
and it supports large number of applications in smartphones.
Version 1.0
First version Android released. It included all the basic programs (search, mail,
contacts, calendar, etc.) along with synchronization. Version 1.1 added the
capability of saving attachment in messages.
Cupcake
Support for widgets, such as a search box into the app on the home screen,
virtual keyboards, MPEG-4 video and Youtube/Picasa uploading.
Donut
Search expanded to include bookmarks and history. More camera integration
and features.
Éclair
Support for Microsoft Exchange mail. Search expanded to include SMS and
MMS messages, and HTML5 support in the browser. More camera features,
including flash, zoom and white balance.
Froyo
Support for Bluetooth hands free, push notifications, Wi-Fi hotspot functionality
and greater screen resolution. Better Microsoft Exchange and Android Market
integration.
Gingerbread
Support was added for VoIP, enhanced copy/paste, front-facing camera, AAC
audio and near field communication (NFC). Gingerbread allowed for screens
with WXGA and higher resolution.
Honeycomb
9
Living in IT Era
Honeycomb was a tablet-only version that took advantage of larger screens.
Touted as “3D Holographic,” it added toolbars at top and bottom and
incorporated tabbed browsing and other desktop features.
Ice Cream Sandwich
Features include facial recognition unlocking, resizable widgets, WI-Fi direct and
touchscreen keys.
Jelly Bean
Jelly Bean provided the user with information automatically throughout the day.
Also included were improved camera features and notifications, speech-to-text
function (voice typing) worked without an Internet connection, although not quite
as accurately. Jelly Bean also included an improved voice search,
Kitkat
A slicker, more polished interface and a host of changes, including improvements
for instant messaging, photo editing and a full-screen display mode that was
more immersive. Support for older phones with less than 1GB of RAM memory.
“OK Google” was added to activate a voice search.
Lollipop
Lollipop defaulted to encrypting the user’s data to prevent theft in the event the
device was compromised. The user’s passcode was required to unlock the
device and data.
Marshmallow
Major features were Android Pay mobile payment system and standardized
fingerprint support, automatic data backup to the Google cloud.
Nougat
Oreo
Version 8 improves battery life and performance by limiting what apps can do in
the background. Users have more control over notifications and autofill, as well
as support for high-quality Bluetooth codecs
Pie
Version 9 provides numerous enhancements. It improves battery life by offering
adaptive features such as learning how you use apps and change brightness. Pie
also predicts what you might do next. Slices display relevant parts of apps, and
gestures can be used in addition to buttons. Multiple and external cameras are
supported, and apps for work can be visually separated. Up to five Bluetooth
devices can be connected, and incoming calls can be sent to all of them with
different volume levels.
Lecture 18:
Creating the best article
Step 1: Find a problem to solve
Your article should solve an issue – either one you encountered yourself and always wanted to find a solution to on the web (this is how I started this blog) or something people ask on mailing lists, forums or Twitter.
Step 2: Research or code (or both)
The first step is the research of the topic you want to cover. When you write, you don’t want to get side-tracked by looking up web sites. Do your surfing, copy and paste the quotes and URLs, take the screenshots and all that jazz. Put them in a folder on your hard drive.
Step 3: Build the article outline
The next thing I do is write the outline of the article as weighted headlines (HTML, eh?). This has a few benefits.
- You know what you will cover and it allows you to limit yourself to what is really needed.
- You will know what follows what you are writing and already know what you don’t need to mention. I myself tend to get excited and want to say everything in the first few lines. This is bad as it doesn’t get the readers on a journey but overloads them instead.
- You can estimate the size of the overall article
- You can write the different parts independent of another. If you get stuck with one sub-topic, jump to one you know inside-out and get this out of the way.
Lecture 19:
Step 4: Fill in keywords for each section
For each of the sections just put in a list of keywords or topics you want to cover. This will help you to write the full text.
Step 5: Write the full text for each section.
As said before you can do that in succession or part by part. I find myself filling in different sections at different times. Mostly I get out the laptop on the train and fill in a quick section I know very well on a short ride. That means it is out of my way.
Lecture 20:
Step 6: Add fillers from section to section
I then add a sentence after each section that sums up what we achieved and what we will do next. This is not really needed but great for reading flow.
Step 7: Read the lot and delete what can be deleted
The last step is to read the whole text (probably printed out as you find more mistakes that way) and see how it flows. Alter as needed and remove all the things that seemed a great idea at the first time of writing but seem superfluous now. People are busy.
Lecture 21:
7. Future of the Internet
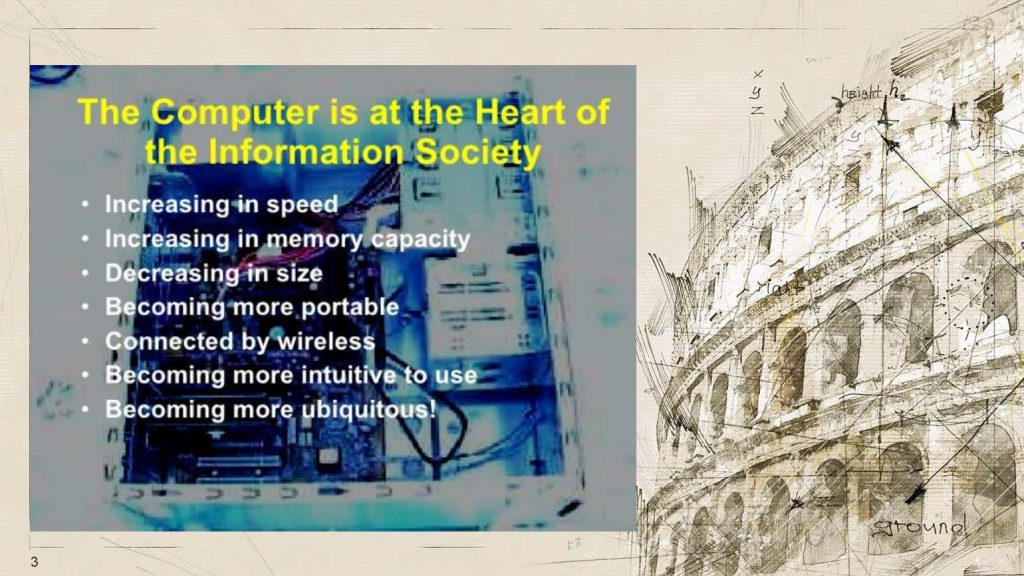
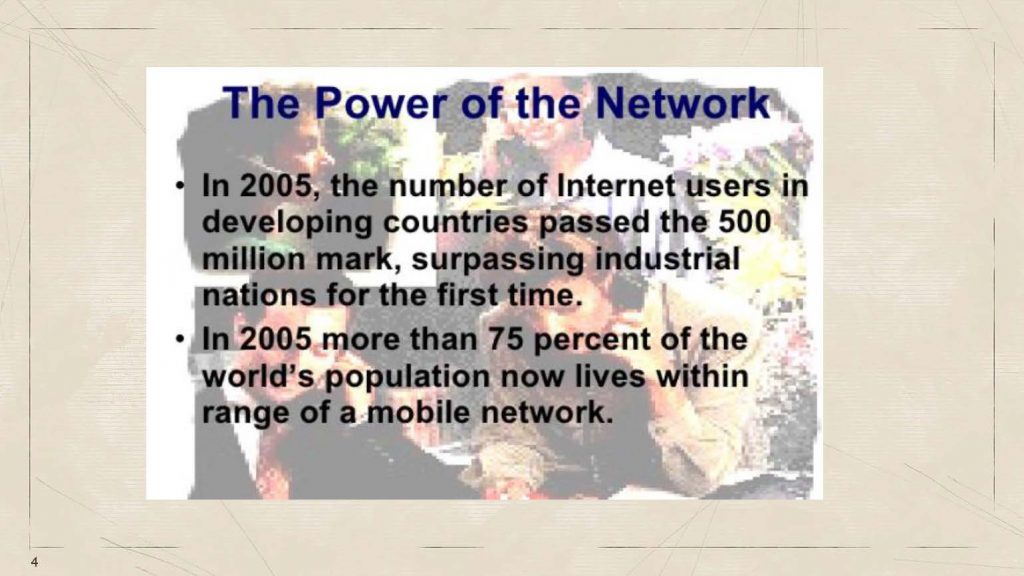
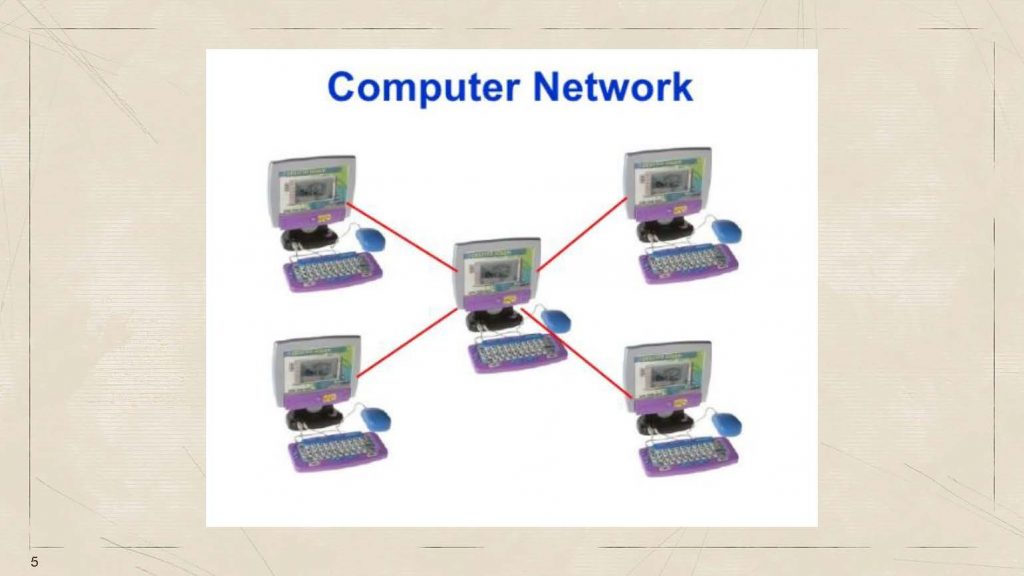
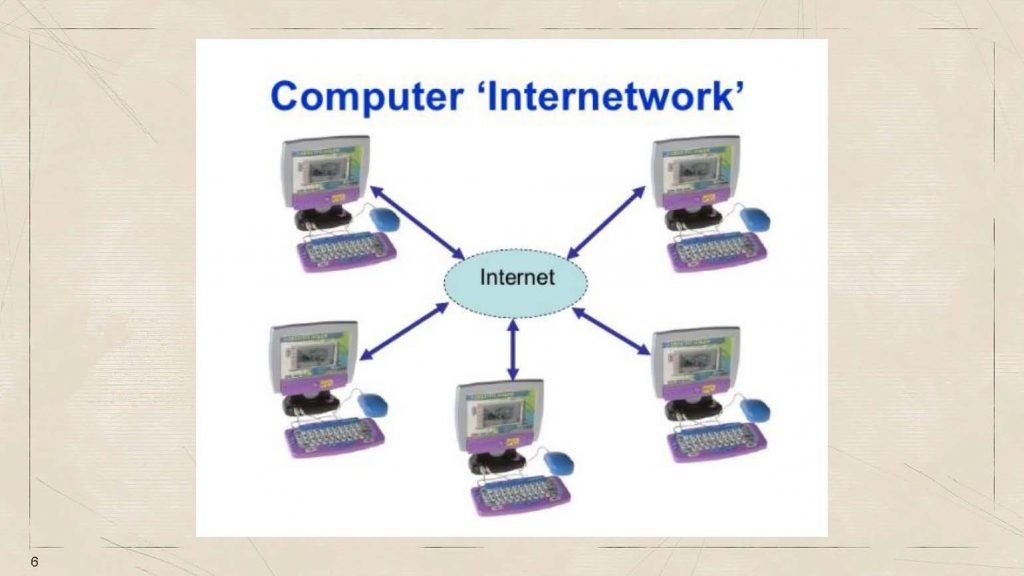
Lecture 22:
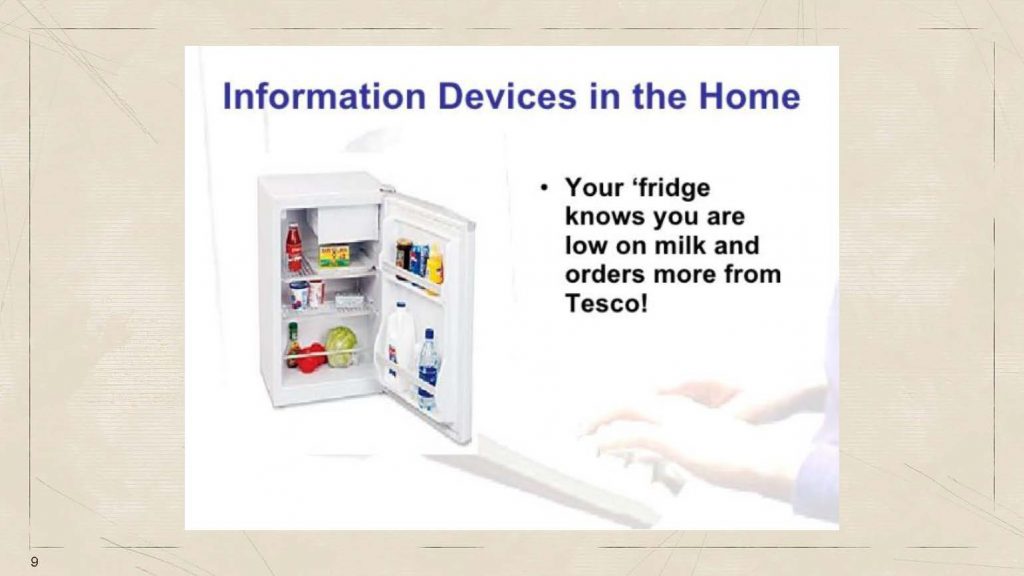
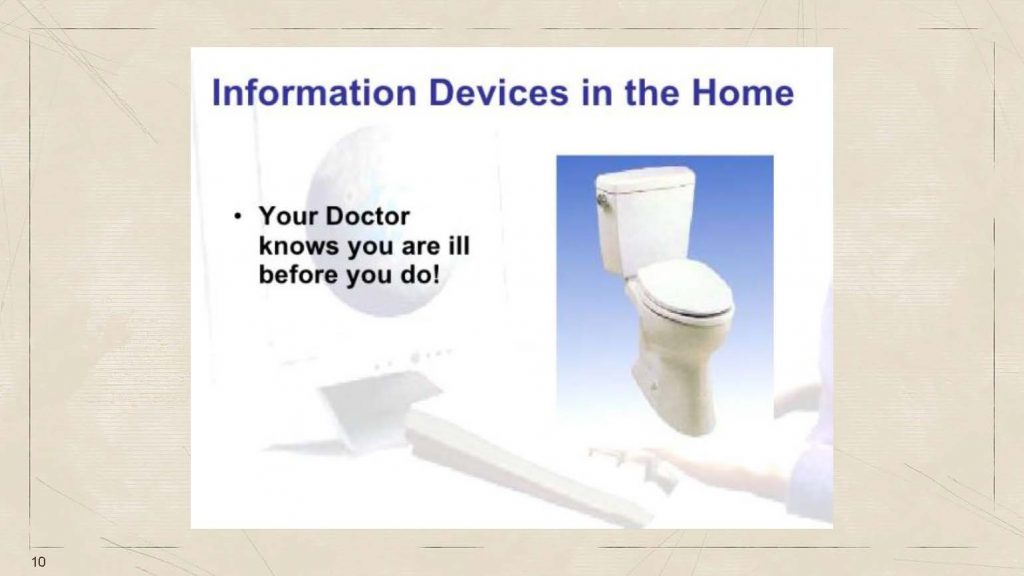
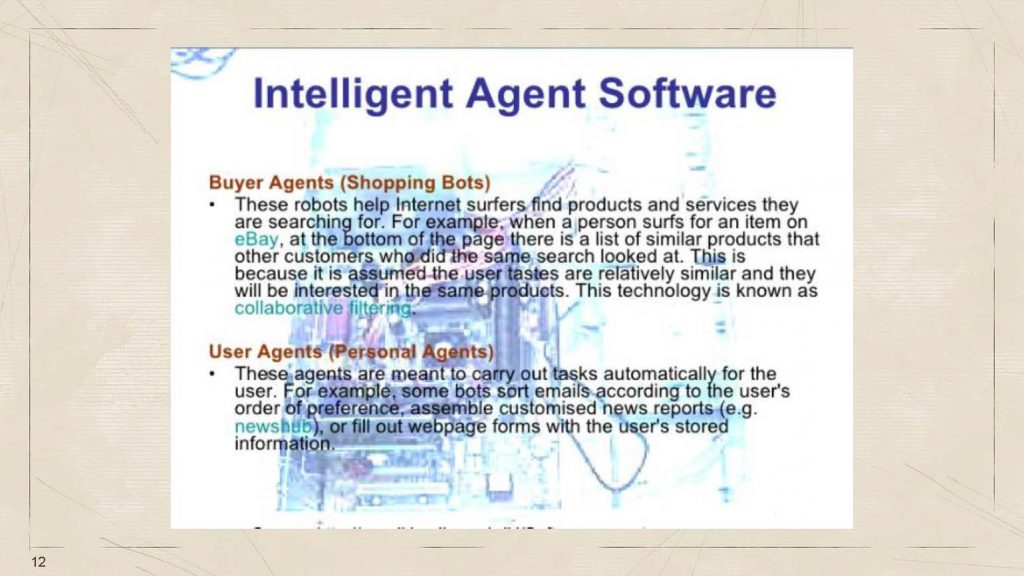
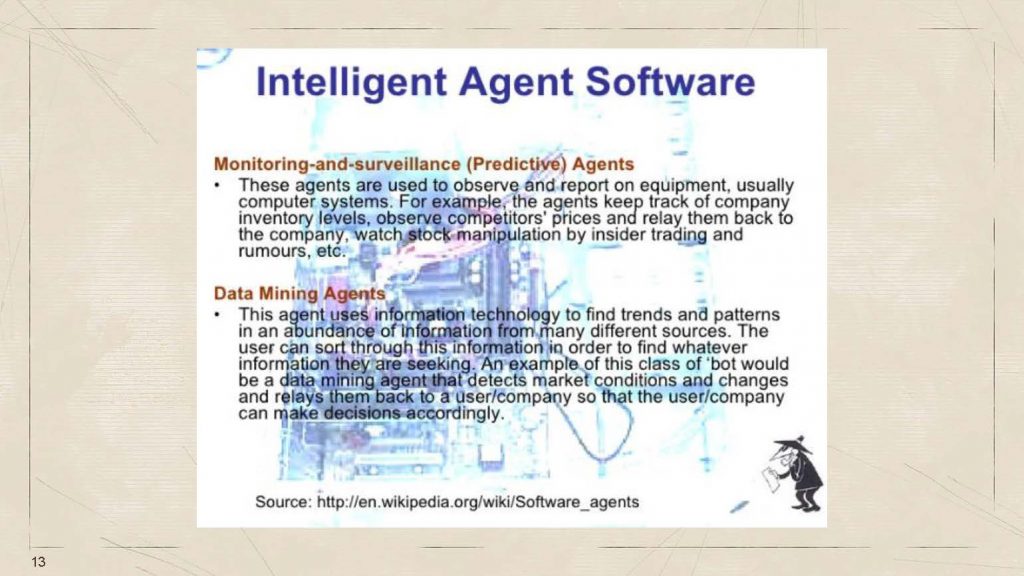
Lecture 23:
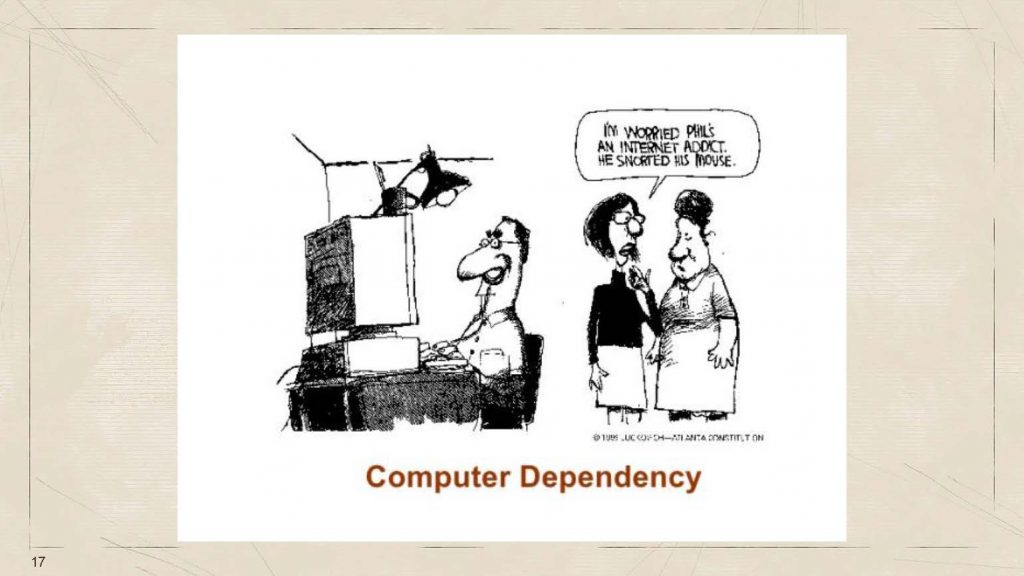

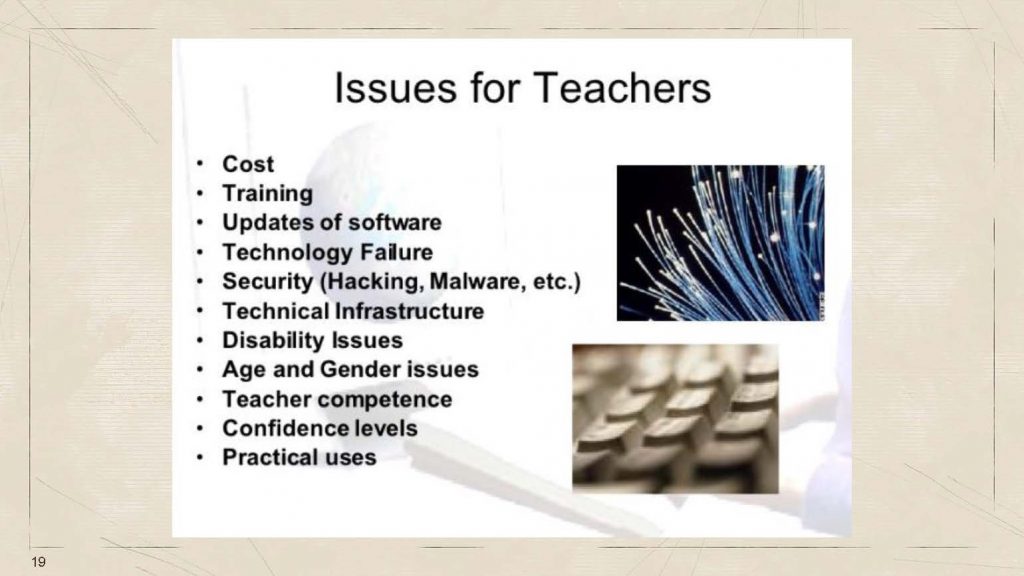
Lecture 24:
Creating the best quiz
To enhance learning, one can have it by creating a quiz as it makes the learner recall and analyze the things learned by creating questions.
This can be done by making a quiz presentation so that the learner will have a time-bounded quiz in front. You can combine it with the talking head, screencast, slide presentation, and article creation to have the best form of quiz presentation.
Assignment:
1. Go to unrealengine.com, read about it then make a 1-page article about Unreal Engine.
2. Go to ads.google.com, read about it then make a 1-page article about Google Ads.