Hi! Great day! Welcome to this course. Thank you for taking an interest in this course. Learning from this course will help you become adept at it.
To start our lesson, let us first define what a database is:
A Database
A database is a collection of data that is organized in a manner that facilitates ease of access, as well as efficient management and updating.
A database is made up of tables that store relevant information.
For example, you would use a database, if you were to create a website like YouTube, which contains a lot of information like videos, usernames, passwords, comments.
In this course we will learn how to create and query databases using SQL! But before that we should first learn how to install XAMPP and use it to start creating and querying about databases. Here is the detailed steps:
Step 1: Downloading XAMPP From Apache


For Mac Users
The first thing you will need to do is go into you preferred browser and go to Apache’s Website. From here, you will go to Download and scroll to the Mac section. DO NOT CLICK DOWNLOAD. This was one of my first mistakes when trying to install XAMPP. The downloads on this page are Virtual Machines, which is not what you want. You will want to click More Downloads under the Mac section.
This will bring you to Source forge. You should now see a list of file folders, click on the folder labeled:
- XAMPP Mac OS X
- The current version (7.3.4)
- xampp-osx-7.3.4-0-installer.dmg
- The current version (7.3.4)
Your download will begin. Save and run the dmg file.
For Windows Users
For Windows users the process is similar, but far easier to follow through with. XAMPP has an installer for Windows systems on their website, and all you really need to do is follow a few steps. Select the XAMPP for Windows button on Apache’s website, the same one you go to in order to find the Mac version. This will take you to another page where it will immediately prompt you to confirm downloading the Windows version of XAMPP. Simply run the .exe file that is downloaded and follow the steps you are prompted with. Be sure to remember where XAMPP Installs to, this is important for using the application.
Once you have finished installing XAMPP go to the location it has been installed to and find the XAMPP control panel (Titled xampp-control.exe). This file will be located near the bottom of the XAMPP install folder. Right click on this file and select the properties tab. Move to the compatibility tab and check of Run as administrator. This will allow the application to access any file it may need to for full functionality. Once you have done that, the application should be fully functional.Add TipAsk QuestionCommentDownload
Step 2: Setting Up the Database

2 More Images
For Mac Users
Finding your XAMPP Files
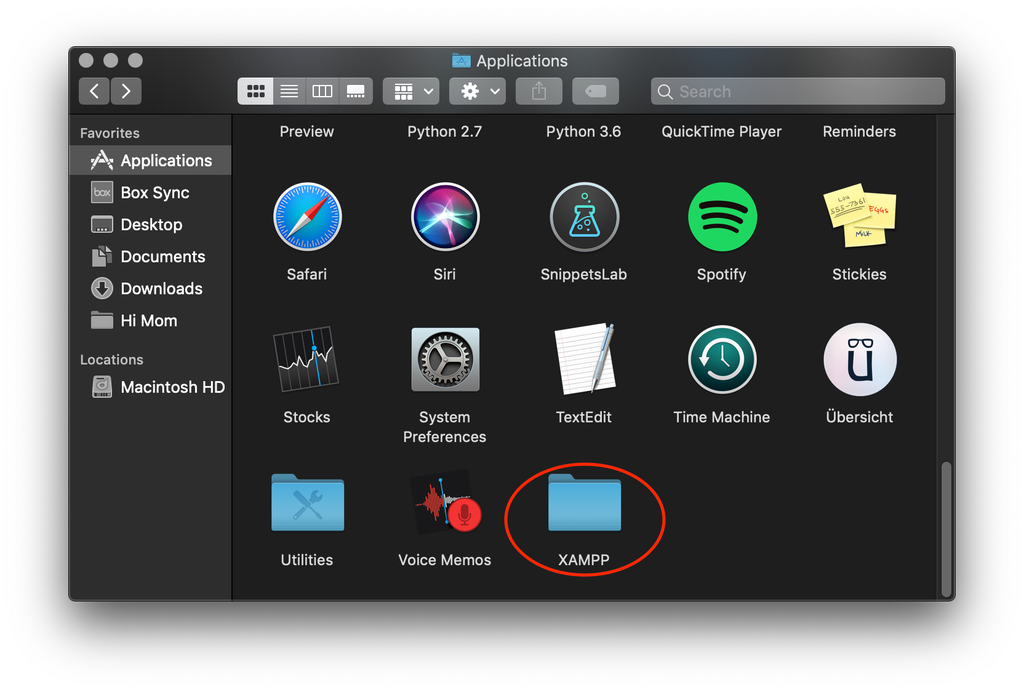
After you run the download, you will have a XAMPP folder in your Mac Applications. Click that folder and you will see a application called manager-osx, the logo is a gear in a bubble, open it.
You will be promoted to enter your Mac’s password, don’t worry it just needs to run the server.
Starting XAMPP
A XAMPP screen will pop up, click the middle button titled Manage Servers. At the bottom click Start All, wait for the lights next to the servers to turn green, you are ready for the next step!
For Windows Users
Finding your XAMPP Files
All XAMPP files will be located in the same place as your control panel. If you have given this program administrator access (As suggested in the last step) you shouldn’t be prompted for any further input beyond maybe confirming that this .exe has administrator access depending on how your preferences are set.
Starting XAMPP
Select the control panel and if necessary confirm administrator access. This will open a panel with several options. The only relevant ones for operating a database are the top two. Those labelled Apache and MySQL. Start those two and you’re ready to proceed to the final step (They should be lit up green as in the image).Add TipAsk QuestionCommentDownload
Step 3: Connecting to PhpMyAdmin


For Mac and Windows
Now that we have our servers running, you can create your database!
Connecting to local host
Getting to your local host is super easy! Open your preferred browser, and type “localhost” in the address bar. Note: (You do not want to type localhost into the google search bar. If you do, you will not allow access to phpMyAdmin). After hitting enter, you are now greeted with the XAMPP welcome page. Congratulations, you successfully installed XAMPP!
phpMyAdmin
In the top right corner of the welcome page you will see a button called phpMyAdmin, click it. This brings you to the phpMyAdmin client. While phpMyAdmin can look overwhelming, I assure you it is easy to navigate.
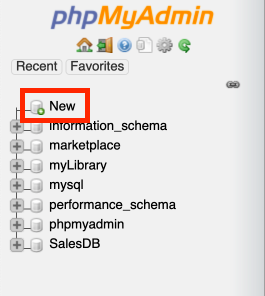
One the left side of your phpMyAdmin client, you will see a stack of names, these are your databases. Mine may look different than yours, that is okay. Click the “New” button at the top of the stack, this is where you will create your database.Add TipAsk QuestionCommentDownload
Step 4: Creating Your Database


You will now see an input box near the center of your screen. Decide what you want to name your database, type in the name, and hit create. Note: Do not worry about changing the language from latin1_swedish_ci.
Creating Database Tables
Finally we need to create the tables our data will be stored in. For this, think of a customer in an online store. What attributes does a customer have? To name a few:
- Name
- Unique ID(UserID)
- Address
Each of these would be a column in our table.
Now, name your table and select the number of columns you want to have. In the example, we would enter Customer with 3 columns. After you have chosen the table name and number of columns click Go on the right side of your screen.
Initializing Columns for the Table
We now have to initialize our columns based on their type. Enter the names of your columns, select the type for each, and the max length you want to allow. Click save in the bottom right corner, and your done!
You have successfully created a database with a table and column that is ready for data to be inserted.
Database Tables
A table stores and displays data in a structured format consisting of columns and rows that are similar to those seen in Excel spreadsheets.
Databases often contain multiple tables, each designed for a specific purpose. For example, imagine creating a database table of names and telephone numbers.
First, we would set up columns with the titles FirstName, LastName and TelephoneNumber.
Each table includes its own set of fields, based on the data it will store.
A table has a specified number of columns but can have any number of rows.
Primary Keys
A primary key is a field in the table that uniquely identifies the table records.
The primary key’s main features:
– It must contain a unique value for each row.
– It cannot contain NULL values.
For example, our table contains a record for each name in a phone book. The unique ID number would be a good choice for a primary key in the table, as there is always the chance for more than one person to have the same name.
– Tables are limited to ONE primary key each.
– The primary key’s value must be different for each row.
What is SQL?
Once you understand what a database is, understanding SQL is easy. SQL stands for Structured Query Language.
SQL is used to access and manipulate a database.
MySQL is a program that understands SQL.
SQL can:
– insert, update, or delete records in a database.
– create new databases, table, stored procedures, views.
– retrieve data from a database, etc.
SQL is an ANSI (American National Standards Institute) standard, but there are different versions of the SQL language.
Most SQL database programs have their own proprietary extensions in addition to the SQL standard, but all of them support the major commands.
The SQL CREATE DATABASE Statement
The CREATE DATABASE statement is used to create a new SQL database.
Syntax
CREATE DATABASE databasename;
CREATE DATABASE Example
The following SQL statement creates a database called “testDB”:
Example
CREATE DATABASE testDB;
Tip: Make sure you have admin privilege before creating any database. Once a database is created, you can check it in the list of databases with the following SQL command: SHOW DATABASES;
The SQL DROP DATABASE Statement
The DROP DATABASE statement is used to drop an existing SQL database.
Syntax
DROP DATABASE databasename;
Note: Be careful before dropping a database. Deleting a database will result in loss of complete information stored in the database!
DROP DATABASE Example
The following SQL statement drops the existing database “testDB”:
Example
DROP DATABASE testDB;
Tip: Make sure you have admin privilege before dropping any database. Once a database is dropped, you can check it in the list of databases with the following SQL command: SHOW DATABASES;
The SQL BACKUP DATABASE Statement
The BACKUP DATABASE statement is used in SQL Server to create a full back up of an existing SQL database.
Syntax
BACKUP DATABASE databasename
TO DISK = ‘filepath‘;
The SQL BACKUP WITH DIFFERENTIAL Statement
A differential back up only backs up the parts of the database that have changed since the last full database backup.
Syntax
BACKUP DATABASE databasename
TO DISK = ‘filepath‘
WITH DIFFERENTIAL;
BACKUP DATABASE Example
The following SQL statement creates a full back up of the existing database “testDB” to the D disk:
Example
BACKUP DATABASE testDB
TO DISK = ‘D:\backups\testDB.bak’;
Tip: Always back up the database to a different drive than the actual database. Then, if you get a disk crash, you will not lose your backup file along with the database.
BACKUP WITH DIFFERENTIAL Example
The following SQL statement creates a differential back up of the database “testDB”:
Example
BACKUP DATABASE testDB
TO DISK = ‘D:\backups\testDB.bak’
WITH DIFFERENTIAL;
Tip: A differential back up reduces the back up time (since only the changes are backed up).
The SQL CREATE TABLE Statement
The CREATE TABLE statement is used to create a new table in a database.
Syntax
CREATE TABLE table_name (
column1 datatype,
column2 datatype,
column3 datatype,
….
);
The column parameters specify the names of the columns of the table.
The datatype parameter specifies the type of data the column can hold (e.g. varchar, integer, date, etc.).
Tip: For an overview of the available data types, go to our complete Data Types Reference.
SQL CREATE TABLE Example
The following example creates a table called “Persons” that contains five columns: PersonID, LastName, FirstName, Address, and City:
Example
CREATE TABLE Persons (
PersonID int,
LastName varchar(255),
FirstName varchar(255),
Address varchar(255),
City varchar(255)
);Try it Yourself »
The PersonID column is of type int and will hold an integer.
The LastName, FirstName, Address, and City columns are of type varchar and will hold characters, and the maximum length for these fields is 255 characters.
The empty “Persons” table will now look like this:
| PersonID | LastName | FirstName | Address | City |
|---|---|---|---|---|
Tip: The empty “Persons” table can now be filled with data with the SQL INSERT INTO statement.
Create Table Using Another Table
A copy of an existing table can also be created using CREATE TABLE.
The new table gets the same column definitions. All columns or specific columns can be selected.
If you create a new table using an existing table, the new table will be filled with the existing values from the old table.
Syntax
CREATE TABLE new_table_name AS
SELECT column1, column2,…
FROM existing_table_name
WHERE ….;
The following SQL creates a new table called “TestTables” (which is a copy of the “Customers” table):
Example
CREATE TABLE TestTable AS
SELECT customername, contactname
FROM customers;
The SQL DROP TABLE Statement
The DROP TABLE statement is used to drop an existing table in a database.
Syntax
DROP TABLE table_name;
Note: Be careful before dropping a table. Deleting a table will result in loss of complete information stored in the table!
SQL DROP TABLE Example
The following SQL statement drops the existing table “Shippers”:
Example
DROP TABLE Shippers;Try it Yourself »
SQL TRUNCATE TABLE
The TRUNCATE TABLE statement is used to delete the data inside a table, but not the table itself.
Syntax
TRUNCATE TABLE table_name;
SQL ALTER TABLE Statement
The ALTER TABLE statement is used to add, delete, or modify columns in an existing table.
The ALTER TABLE statement is also used to add and drop various constraints on an existing table.
ALTER TABLE – ADD Column
To add a column in a table, use the following syntax:ALTER TABLE table_name
ADD column_name datatype;
The following SQL adds an “Email” column to the “Customers” table:
Example
ALTER TABLE Customers
ADD Email varchar(255);Try it Yourself »
ALTER TABLE – DROP COLUMN
To delete a column in a table, use the following syntax (notice that some database systems don’t allow deleting a column):ALTER TABLE table_name
DROP COLUMN column_name;
The following SQL deletes the “Email” column from the “Customers” table:
Example
ALTER TABLE Customers
DROP COLUMN Email;Try it Yourself »
ALTER TABLE – ALTER/MODIFY COLUMN
To change the data type of a column in a table, use the following syntax:
SQL Server / MS Access:ALTER TABLE table_name
ALTER COLUMN column_name datatype;
My SQL / Oracle (prior version 10G):ALTER TABLE table_name
MODIFY COLUMN column_name datatype;
Oracle 10G and later:ALTER TABLE table_name
MODIFY column_name datatype;
ADVERTISEMENT
SQL ALTER TABLE Example
Look at the “Persons” table:
| ID | LastName | FirstName | Address | City |
|---|---|---|---|---|
| 1 | Hansen | Ola | Timoteivn 10 | Sandnes |
| 2 | Svendson | Tove | Borgvn 23 | Sandnes |
| 3 | Pettersen | Kari | Storgt 20 | Stavanger |
Now we want to add a column named “DateOfBirth” in the “Persons” table.
We use the following SQL statement:ALTER TABLE Persons
ADD DateOfBirth date;
Notice that the new column, “DateOfBirth”, is of type date and is going to hold a date. The data type specifies what type of data the column can hold. For a complete reference of all the data types available in MS Access, MySQL, and SQL Server, go to our complete Data Types reference.
The “Persons” table will now look like this:
| ID | LastName | FirstName | Address | City | DateOfBirth |
|---|---|---|---|---|---|
| 1 | Hansen | Ola | Timoteivn 10 | Sandnes | |
| 2 | Svendson | Tove | Borgvn 23 | Sandnes | |
| 3 | Pettersen | Kari | Storgt 20 | Stavanger |
Change Data Type Example
Now we want to change the data type of the column named “DateOfBirth” in the “Persons” table.
We use the following SQL statement:ALTER TABLE Persons
ALTER COLUMN DateOfBirth year;
Notice that the “DateOfBirth” column is now of type year and is going to hold a year in a two- or four-digit format.
DROP COLUMN Example
Next, we want to delete the column named “DateOfBirth” in the “Persons” table.
We use the following SQL statement:ALTER TABLE Persons
DROP COLUMN DateOfBirth;
The “Persons” table will now look like this:
| ID | LastName | FirstName | Address | City |
|---|---|---|---|---|
| 1 | Hansen | Ola | Timoteivn 10 | Sandnes |
| 2 | Svendson | Tove | Borgvn 23 | Sandnes |
| 3 | Pettersen | Kari | Storgt 20 | Stavanger |
SQL constraints are used to specify rules for data in a table.
SQL Create Constraints
Constraints can be specified when the table is created with the CREATE TABLE statement, or after the table is created with the ALTER TABLE statement.
Syntax
CREATE TABLE table_name (
column1 datatypeconstraint,
column2 datatypeconstraint,
column3 datatypeconstraint,
….
);
SQL Constraints
SQL constraints are used to specify rules for the data in a table.
Constraints are used to limit the type of data that can go into a table. This ensures the accuracy and reliability of the data in the table. If there is any violation between the constraint and the data action, the action is aborted.
Constraints can be column level or table level. Column level constraints apply to a column, and table level constraints apply to the whole table.
The following constraints are commonly used in SQL:
NOT NULL– Ensures that a column cannot have a NULL valueUNIQUE– Ensures that all values in a column are differentPRIMARY KEY– A combination of aNOT NULLandUNIQUE. Uniquely identifies each row in a tableFOREIGN KEY– Prevents actions that would destroy links between tablesCHECK– Ensures that the values in a column satisfies a specific conditionDEFAULT– Sets a default value for a column if no value is specifiedCREATE INDEX– Used to create and retrieve data from the database very quickly
SQL NOT NULL Constraint
By default, a column can hold NULL values.
The NOT NULL constraint enforces a column to NOT accept NULL values.
This enforces a field to always contain a value, which means that you cannot insert a new record, or update a record without adding a value to this field.
SQL NOT NULL on CREATE TABLE
The following SQL ensures that the “ID”, “LastName”, and “FirstName” columns will NOT accept NULL values when the “Persons” table is created:
Example
CREATE TABLE Persons (
ID int NOT NULL,
LastName varchar(255) NOT NULL,
FirstName varchar(255) NOT NULL,
Age int
);Try it Yourself »
SQL NOT NULL on ALTER TABLE
To create a NOT NULL constraint on the “Age” column when the “Persons” table is already created, use the following SQL:ALTER TABLE Persons
MODIFY Age int NOT NULL;
SQL UNIQUE Constraint
The UNIQUE constraint ensures that all values in a column are different.
Both the UNIQUE and PRIMARY KEY constraints provide a guarantee for uniqueness for a column or set of columns.
A PRIMARY KEY constraint automatically has a UNIQUE constraint.
However, you can have many UNIQUE constraints per table, but only one PRIMARY KEY constraint per table.
SQL UNIQUE Constraint on CREATE TABLE
The following SQL creates a UNIQUE constraint on the “ID” column when the “Persons” table is created:
SQL Server / Oracle / MS Access:CREATE TABLE Persons (
ID int NOT NULL UNIQUE,
LastName varchar(255) NOT NULL,
FirstName varchar(255),
Age int
);
MySQL:CREATE TABLE Persons (
ID int NOT NULL,
LastName varchar(255) NOT NULL,
FirstName varchar(255),
Age int,
UNIQUE (ID)
);
To name a UNIQUE constraint, and to define a UNIQUE constraint on multiple columns, use the following SQL syntax:
MySQL / SQL Server / Oracle / MS Access:CREATE TABLE Persons (
ID int NOT NULL,
LastName varchar(255) NOT NULL,
FirstName varchar(255),
Age int,
CONSTRAINT UC_Person UNIQUE (ID,LastName)
);
SQL UNIQUE Constraint on ALTER TABLE
To create a UNIQUE constraint on the “ID” column when the table is already created, use the following SQL:
MySQL / SQL Server / Oracle / MS Access:ALTER TABLE Persons
ADD UNIQUE (ID);
To name a UNIQUE constraint, and to define a UNIQUE constraint on multiple columns, use the following SQL syntax:
MySQL / SQL Server / Oracle / MS Access:ALTER TABLE Persons
ADD CONSTRAINT UC_Person UNIQUE (ID,LastName);
DROP a UNIQUE Constraint
To drop a UNIQUE constraint, use the following SQL:
MySQL:ALTER TABLE Persons
DROP INDEX UC_Person;
SQL Server / Oracle / MS Access:ALTER TABLE Persons
DROP CONSTRAINT UC_Person;
SQL PRIMARY KEY Constraint
The PRIMARY KEY constraint uniquely identifies each record in a table.
Primary keys must contain UNIQUE values, and cannot contain NULL values.
A table can have only ONE primary key; and in the table, this primary key can consist of single or multiple columns (fields).
SQL PRIMARY KEY on CREATE TABLE
The following SQL creates a PRIMARY KEY on the “ID” column when the “Persons” table is created:
MySQL:CREATE TABLE Persons (
ID int NOT NULL,
LastName varchar(255) NOT NULL,
FirstName varchar(255),
Age int,
PRIMARY KEY (ID)
);
SQL Server / Oracle / MS Access:CREATE TABLE Persons (
ID int NOT NULL PRIMARY KEY,
LastName varchar(255) NOT NULL,
FirstName varchar(255),
Age int
);
To allow naming of a PRIMARY KEY constraint, and for defining a PRIMARY KEY constraint on multiple columns, use the following SQL syntax:
MySQL / SQL Server / Oracle / MS Access:CREATE TABLE Persons (
ID int NOT NULL,
LastName varchar(255) NOT NULL,
FirstName varchar(255),
Age int,
CONSTRAINT PK_Person PRIMARY KEY (ID,LastName)
);
Note: In the example above there is only ONE PRIMARY KEY (PK_Person). However, the VALUE of the primary key is made up of TWO COLUMNS (ID + LastName).
SQL PRIMARY KEY on ALTER TABLE
To create a PRIMARY KEY constraint on the “ID” column when the table is already created, use the following SQL:
MySQL / SQL Server / Oracle / MS Access:ALTER TABLE Persons
ADD PRIMARY KEY (ID);
To allow naming of a PRIMARY KEY constraint, and for defining a PRIMARY KEY constraint on multiple columns, use the following SQL syntax:
MySQL / SQL Server / Oracle / MS Access:ALTER TABLE Persons
ADD CONSTRAINT PK_Person PRIMARY KEY (ID,LastName);
Note: If you use ALTER TABLE to add a primary key, the primary key column(s) must have been declared to not contain NULL values (when the table was first created).
DROP a PRIMARY KEY Constraint
To drop a PRIMARY KEY constraint, use the following SQL:
MySQL:ALTER TABLE Persons
DROP PRIMARY KEY;
SQL Server / Oracle / MS Access:ALTER TABLE Persons
DROP CONSTRAINT PK_Person;
SQL FOREIGN KEY Constraint
The FOREIGN KEY constraint is used to prevent actions that would destroy links between tables.
A FOREIGN KEY is a field (or collection of fields) in one table, that refers to the PRIMARY KEY in another table.
The table with the foreign key is called the child table, and the table with the primary key is called the referenced or parent table.
Look at the following two tables:
Persons Table
| PersonID | LastName | FirstName | Age |
|---|---|---|---|
| 1 | Hansen | Ola | 30 |
| 2 | Svendson | Tove | 23 |
| 3 | Pettersen | Kari | 20 |
Orders Table
| OrderID | OrderNumber | PersonID |
|---|---|---|
| 1 | 77895 | 3 |
| 2 | 44678 | 3 |
| 3 | 22456 | 2 |
| 4 | 24562 | 1 |
Notice that the “PersonID” column in the “Orders” table points to the “PersonID” column in the “Persons” table.
The “PersonID” column in the “Persons” table is the PRIMARY KEY in the “Persons” table.
The “PersonID” column in the “Orders” table is a FOREIGN KEY in the “Orders” table.
The FOREIGN KEY constraint prevents invalid data from being inserted into the foreign key column, because it has to be one of the values contained in the parent table.
ADVERTISEMENT
SQL FOREIGN KEY on CREATE TABLE
The following SQL creates a FOREIGN KEY on the “PersonID” column when the “Orders” table is created:
MySQL:CREATE TABLE Orders (
OrderID int NOT NULL,
OrderNumber int NOT NULL,
PersonID int,
PRIMARY KEY (OrderID),
FOREIGN KEY (PersonID) REFERENCES Persons(PersonID)
);
SQL Server / Oracle / MS Access:CREATE TABLE Orders (
OrderID int NOT NULL PRIMARY KEY,
OrderNumber int NOT NULL,
PersonID int FOREIGN KEY REFERENCES Persons(PersonID)
);
To allow naming of a FOREIGN KEY constraint, and for defining a FOREIGN KEY constraint on multiple columns, use the following SQL syntax:
MySQL / SQL Server / Oracle / MS Access:CREATE TABLE Orders (
OrderID int NOT NULL,
OrderNumber int NOT NULL,
PersonID int,
PRIMARY KEY (OrderID),
CONSTRAINT FK_PersonOrder FOREIGN KEY (PersonID)
REFERENCES Persons(PersonID)
);
SQL FOREIGN KEY on ALTER TABLE
To create a FOREIGN KEY constraint on the “PersonID” column when the “Orders” table is already created, use the following SQL:
MySQL / SQL Server / Oracle / MS Access:ALTER TABLE Orders
ADD FOREIGN KEY (PersonID) REFERENCES Persons(PersonID);
To allow naming of a FOREIGN KEY constraint, and for defining a FOREIGN KEY constraint on multiple columns, use the following SQL syntax:
MySQL / SQL Server / Oracle / MS Access:ALTER TABLE Orders
ADD CONSTRAINT FK_PersonOrder
FOREIGN KEY (PersonID) REFERENCES Persons(PersonID);
DROP a FOREIGN KEY Constraint
To drop a FOREIGN KEY constraint, use the following SQL:
MySQL:ALTER TABLE Orders
DROP FOREIGN KEY FK_PersonOrder;
SQL Server / Oracle / MS Access:ALTER TABLE Orders
DROP CONSTRAINT FK_PersonOrder;
SQL CHECK Constraint
The CHECK constraint is used to limit the value range that can be placed in a column.
If you define a CHECK constraint on a column it will allow only certain values for this column.
If you define a CHECK constraint on a table it can limit the values in certain columns based on values in other columns in the row.
SQL CHECK on CREATE TABLE
The following SQL creates a CHECK constraint on the “Age” column when the “Persons” table is created. The CHECK constraint ensures that the age of a person must be 18, or older:
MySQL:CREATE TABLE Persons (
ID int NOT NULL,
LastName varchar(255) NOT NULL,
FirstName varchar(255),
Age int,
CHECK (Age>=18)
);
SQL Server / Oracle / MS Access:CREATE TABLE Persons (
ID int NOT NULL,
LastName varchar(255) NOT NULL,
FirstName varchar(255),
Age int CHECK (Age>=18)
);
To allow naming of a CHECK constraint, and for defining a CHECK constraint on multiple columns, use the following SQL syntax:
MySQL / SQL Server / Oracle / MS Access:CREATE TABLE Persons (
ID int NOT NULL,
LastName varchar(255) NOT NULL,
FirstName varchar(255),
Age int,
City varchar(255),
CONSTRAINT CHK_Person CHECK (Age>=18 AND City=’Sandnes’)
);
SQL CHECK on ALTER TABLE
To create a CHECK constraint on the “Age” column when the table is already created, use the following SQL:
MySQL / SQL Server / Oracle / MS Access:ALTER TABLE Persons
ADD CHECK (Age>=18);
To allow naming of a CHECK constraint, and for defining a CHECK constraint on multiple columns, use the following SQL syntax:
MySQL / SQL Server / Oracle / MS Access:ALTER TABLE Persons
ADD CONSTRAINT CHK_PersonAge CHECK (Age>=18 AND City=’Sandnes’);
DROP a CHECK Constraint
To drop a CHECK constraint, use the following SQL:
SQL Server / Oracle / MS Access:ALTER TABLE Persons
DROP CONSTRAINT CHK_PersonAge;
MySQL:ALTER TABLE Persons
DROP CHECK CHK_PersonAge;
SQL DEFAULT Constraint
The DEFAULT constraint is used to set a default value for a column.
The default value will be added to all new records, if no other value is specified.
SQL DEFAULT on CREATE TABLE
The following SQL sets a DEFAULT value for the “City” column when the “Persons” table is created:
My SQL / SQL Server / Oracle / MS Access:CREATE TABLE Persons (
ID int NOT NULL,
LastName varchar(255) NOT NULL,
FirstName varchar(255),
Age int,
City varchar(255) DEFAULT ‘Sandnes’
);
The DEFAULT constraint can also be used to insert system values, by using functions like GETDATE():CREATE TABLE Orders (
ID int NOT NULL,
OrderNumber int NOT NULL,
OrderDate date DEFAULT GETDATE()
);
SQL DEFAULT on ALTER TABLE
To create a DEFAULT constraint on the “City” column when the table is already created, use the following SQL:
MySQL:ALTER TABLE Persons
ALTER City SET DEFAULT ‘Sandnes’;
SQL Server:ALTER TABLE Persons
ADD CONSTRAINT df_City
DEFAULT ‘Sandnes’ FOR City;
MS Access:ALTER TABLE Persons
ALTER COLUMN City SET DEFAULT ‘Sandnes’;
Oracle:ALTER TABLE Persons
MODIFY City DEFAULT ‘Sandnes’;
DROP a DEFAULT Constraint
To drop a DEFAULT constraint, use the following SQL:
MySQL:ALTER TABLE Persons
ALTER City DROP DEFAULT;
SQL Server / Oracle / MS Access:ALTER TABLE Persons
ALTER COLUMN City DROP DEFAULT;
SQL CREATE INDEX Statement
The CREATE INDEX statement is used to create indexes in tables.
Indexes are used to retrieve data from the database more quickly than otherwise. The users cannot see the indexes, they are just used to speed up searches/queries.
Note: Updating a table with indexes takes more time than updating a table without (because the indexes also need an update). So, only create indexes on columns that will be frequently searched against.
CREATE INDEX Syntax
Creates an index on a table. Duplicate values are allowed:CREATE INDEX index_name
ON table_name (column1, column2, …);
CREATE UNIQUE INDEX Syntax
Creates a unique index on a table. Duplicate values are not allowed:CREATE UNIQUE INDEX index_name
ON table_name (column1, column2, …);
Note: The syntax for creating indexes varies among different databases. Therefore: Check the syntax for creating indexes in your database.
CREATE INDEX Example
The SQL statement below creates an index named “idx_lastname” on the “LastName” column in the “Persons” table:CREATE INDEX idx_lastname
ON Persons (LastName);
If you want to create an index on a combination of columns, you can list the column names within the parentheses, separated by commas:CREATE INDEX idx_pname
ON Persons (LastName, FirstName);
DROP INDEX Statement
The DROP INDEX statement is used to delete an index in a table.
MS Access:DROP INDEX index_name ON table_name;
SQL Server:DROP INDEX table_name.index_name;
DB2/Oracle:DROP INDEX index_name;
MySQL:ALTER TABLE table_name
DROP INDEX index_name;
AUTO INCREMENT Field
Auto-increment allows a unique number to be generated automatically when a new record is inserted into a table.
Often this is the primary key field that we would like to be created automatically every time a new record is inserted.
Syntax for MySQL
The following SQL statement defines the “Personid” column to be an auto-increment primary key field in the “Persons” table:CREATE TABLE Persons (
Personid int NOT NULL AUTO_INCREMENT,
LastName varchar(255) NOT NULL,
FirstName varchar(255),
Age int,
PRIMARY KEY (Personid)
);
MySQL uses the AUTO_INCREMENT keyword to perform an auto-increment feature.
By default, the starting value for AUTO_INCREMENT is 1, and it will increment by 1 for each new record.
To let the AUTO_INCREMENT sequence start with another value, use the following SQL statement:ALTER TABLE Persons AUTO_INCREMENT=100;
To insert a new record into the “Persons” table, we will NOT have to specify a value for the “Personid” column (a unique value will be added automatically):INSERT INTO Persons (FirstName,LastName)
VALUES (‘Lars’,’Monsen’);
The SQL statement above would insert a new record into the “Persons” table. The “Personid” column would be assigned a unique value. The “FirstName” column would be set to “Lars” and the “LastName” column would be set to “Monsen”.
Syntax for SQL Server
The following SQL statement defines the “Personid” column to be an auto-increment primary key field in the “Persons” table:CREATE TABLE Persons (
Personid int IDENTITY(1,1) PRIMARY KEY,
LastName varchar(255) NOT NULL,
FirstName varchar(255),
Age int
);
The MS SQL Server uses the IDENTITY keyword to perform an auto-increment feature.
In the example above, the starting value for IDENTITY is 1, and it will increment by 1 for each new record.
Tip: To specify that the “Personid” column should start at value 10 and increment by 5, change it to IDENTITY(10,5).
To insert a new record into the “Persons” table, we will NOT have to specify a value for the “Personid” column (a unique value will be added automatically):INSERT INTO Persons (FirstName,LastName)
VALUES (‘Lars’,’Monsen’);
The SQL statement above would insert a new record into the “Persons” table. The “Personid” column would be assigned a unique value. The “FirstName” column would be set to “Lars” and the “LastName” column would be set to “Monsen”.
ADVERTISEMENT
Syntax for Access
The following SQL statement defines the “Personid” column to be an auto-increment primary key field in the “Persons” table:CREATE TABLE Persons (
Personid AUTOINCREMENT PRIMARY KEY,
LastName varchar(255) NOT NULL,
FirstName varchar(255),
Age int
);
The MS Access uses the AUTOINCREMENT keyword to perform an auto-increment feature.
By default, the starting value for AUTOINCREMENT is 1, and it will increment by 1 for each new record.
Tip: To specify that the “Personid” column should start at value 10 and increment by 5, change the autoincrement to AUTOINCREMENT(10,5).
To insert a new record into the “Persons” table, we will NOT have to specify a value for the “Personid” column (a unique value will be added automatically):INSERT INTO Persons (FirstName,LastName)
VALUES (‘Lars’,’Monsen’);
The SQL statement above would insert a new record into the “Persons” table. The “Personid” column would be assigned a unique value. The “FirstName” column would be set to “Lars” and the “LastName” column would be set to “Monsen”.
Syntax for Oracle
In Oracle the code is a little bit more tricky.
You will have to create an auto-increment field with the sequence object (this object generates a number sequence).
Use the following CREATE SEQUENCE syntax:CREATE SEQUENCE seq_person
MINVALUE 1
START WITH 1
INCREMENT BY 1
CACHE 10;
The code above creates a sequence object called seq_person, that starts with 1 and will increment by 1. It will also cache up to 10 values for performance. The cache option specifies how many sequence values will be stored in memory for faster access.
To insert a new record into the “Persons” table, we will have to use the nextval function (this function retrieves the next value from seq_person sequence):INSERT INTO Persons (Personid,FirstName,LastName)
VALUES (seq_person.nextval,’Lars’,’Monsen’);
The SQL statement above would insert a new record into the “Persons” table. The “Personid” column would be assigned the next number from the seq_person sequence. The “FirstName” column would be set to “Lars” and the “LastName” column would be set to “Monsen”.
SQL Dates
The most difficult part when working with dates is to be sure that the format of the date you are trying to insert, matches the format of the date column in the database.
As long as your data contains only the date portion, your queries will work as expected. However, if a time portion is involved, it gets more complicated.
SQL Date Data Types
MySQL comes with the following data types for storing a date or a date/time value in the database:
DATE– format YYYY-MM-DDDATETIME– format: YYYY-MM-DD HH:MI:SSTIMESTAMP– format: YYYY-MM-DD HH:MI:SSYEAR– format YYYY or YY
SQL Server comes with the following data types for storing a date or a date/time value in the database:
DATE– format YYYY-MM-DDDATETIME– format: YYYY-MM-DD HH:MI:SSSMALLDATETIME– format: YYYY-MM-DD HH:MI:SSTIMESTAMP– format: a unique number
Note: The date types are chosen for a column when you create a new table in your database!
SQL Working with Dates
Look at the following table:
Orders Table
| OrderId | ProductName | OrderDate |
|---|---|---|
| 1 | Geitost | 2008-11-11 |
| 2 | Camembert Pierrot | 2008-11-09 |
| 3 | Mozzarella di Giovanni | 2008-11-11 |
| 4 | Mascarpone Fabioli | 2008-10-29 |
Now we want to select the records with an OrderDate of “2008-11-11” from the table above.
We use the following SELECT statement:SELECT * FROM Orders WHERE OrderDate=’2008-11-11′
The result-set will look like this:
| OrderId | ProductName | OrderDate |
|---|---|---|
| 1 | Geitost | 2008-11-11 |
| 3 | Mozzarella di Giovanni | 2008-11-11 |
Note: Two dates can easily be compared if there is no time component involved!
Now, assume that the “Orders” table looks like this (notice the added time-component in the “OrderDate” column):
| OrderId | ProductName | OrderDate |
|---|---|---|
| 1 | Geitost | 2008-11-11 13:23:44 |
| 2 | Camembert Pierrot | 2008-11-09 15:45:21 |
| 3 | Mozzarella di Giovanni | 2008-11-11 11:12:01 |
| 4 | Mascarpone Fabioli | 2008-10-29 14:56:59 |
If we use the same SELECT statement as above:SELECT * FROM Orders WHERE OrderDate=’2008-11-11′
we will get no result! This is because the query is looking only for dates with no time portion.
Tip: To keep your queries simple and easy to maintain, do not use time-components in your dates, unless you have to!
SQL CREATE VIEW Statement
In SQL, a view is a virtual table based on the result-set of an SQL statement.
A view contains rows and columns, just like a real table. The fields in a view are fields from one or more real tables in the database.
You can add SQL statements and functions to a view and present the data as if the data were coming from one single table.
A view is created with the CREATE VIEW statement.
CREATE VIEW Syntax
CREATE VIEW view_name AS
SELECT column1, column2, …
FROM table_name
WHERE condition;
Note: A view always shows up-to-date data! The database engine recreates the view, every time a user queries it.
SQL CREATE VIEW Examples
The following SQL creates a view that shows all customers from Brazil:
Example
CREATE VIEW [Brazil Customers] AS
SELECT CustomerName, ContactName
FROM Customers
WHERE Country = ‘Brazil’;Try it Yourself »
We can query the view above as follows:
Example
SELECT * FROM [Brazil Customers];Try it Yourself »
The following SQL creates a view that selects every product in the “Products” table with a price higher than the average price:
Example
CREATE VIEW [Products Above Average Price] AS
SELECT ProductName, Price
FROM Products
WHERE Price > (SELECT AVG(Price) FROM Products);Try it Yourself »
We can query the view above as follows:
Example
SELECT * FROM [Products Above Average Price];Try it Yourself »
ADVERTISEMENT
SQL Updating a View
A view can be updated with the CREATE OR REPLACE VIEW statement.
SQL CREATE OR REPLACE VIEW Syntax
CREATE OR REPLACE VIEW view_name AS
SELECT column1, column2, …
FROM table_name
WHERE condition;
The following SQL adds the “City” column to the “Brazil Customers” view:
Example
CREATE OR REPLACE VIEW [Brazil Customers] AS
SELECT CustomerName, ContactName, City
FROM Customers
WHERE Country = ‘Brazil’;Try it Yourself »
SQL Dropping a View
A view is deleted with the DROP VIEW statement.
SQL DROP VIEW Syntax
DROP VIEW view_name;
The following SQL drops the “Brazil Customers” view:
Example
DROP VIEW [Brazil Customers];
SQL Injection
SQL injection is a code injection technique that might destroy your database.
SQL injection is one of the most common web hacking techniques.
SQL injection is the placement of malicious code in SQL statements, via web page input.
SQL in Web Pages
SQL injection usually occurs when you ask a user for input, like their username/userid, and instead of a name/id, the user gives you an SQL statement that you will unknowingly run on your database.
Look at the following example which creates a SELECT statement by adding a variable (txtUserId) to a select string. The variable is fetched from user input (getRequestString):
Example
txtUserId = getRequestString(“UserId”);
txtSQL = “SELECT * FROM Users WHERE UserId = ” + txtUserId;
The rest of this chapter describes the potential dangers of using user input in SQL statements.
SQL Injection Based on 1=1 is Always True
Look at the example above again. The original purpose of the code was to create an SQL statement to select a user, with a given user id.
If there is nothing to prevent a user from entering “wrong” input, the user can enter some “smart” input like this:
UserId:
Then, the SQL statement will look like this:SELECT * FROM Users WHERE UserId = 105 OR 1=1;
The SQL above is valid and will return ALL rows from the “Users” table, since OR 1=1 is always TRUE.
Does the example above look dangerous? What if the “Users” table contains names and passwords?
The SQL statement above is much the same as this:SELECT UserId, Name, Password FROM Users WHERE UserId = 105 or 1=1;
A hacker might get access to all the user names and passwords in a database, by simply inserting 105 OR 1=1 into the input field.
ADVERTISEMENT
SQL Injection Based on “”=”” is Always True
Here is an example of a user login on a web site:
Username:
Password:
Example
uName = getRequestString(“username”);
uPass = getRequestString(“userpassword”);
sql = ‘SELECT * FROM Users WHERE Name =”‘ + uName + ‘” AND Pass =”‘ + uPass + ‘”‘
Result
SELECT * FROM Users WHERE Name =”John Doe” AND Pass =”myPass”
A hacker might get access to user names and passwords in a database by simply inserting ” OR “”=” into the user name or password text box:
User Name:
Password:
The code at the server will create a valid SQL statement like this:
Result
SELECT * FROM Users WHERE Name =”” or “”=”” AND Pass =”” or “”=””
The SQL above is valid and will return all rows from the “Users” table, since OR “”=”” is always TRUE.
SQL Injection Based on Batched SQL Statements
Most databases support batched SQL statement.
A batch of SQL statements is a group of two or more SQL statements, separated by semicolons.
The SQL statement below will return all rows from the “Users” table, then delete the “Suppliers” table.
Example
SELECT * FROM Users; DROP TABLE Suppliers
Look at the following example:
Example
txtUserId = getRequestString(“UserId”);
txtSQL = “SELECT * FROM Users WHERE UserId = ” + txtUserId;
And the following input:
User id:
The valid SQL statement would look like this:
Result
SELECT * FROM Users WHERE UserId = 105; DROP TABLE Suppliers;
Use SQL Parameters for Protection
To protect a web site from SQL injection, you can use SQL parameters.
SQL parameters are values that are added to an SQL query at execution time, in a controlled manner.
ASP.NET Razor Example
txtUserId = getRequestString(“UserId”);
txtSQL = “SELECT * FROM Users WHERE UserId = @0”;
db.Execute(txtSQL,txtUserId);
Note that parameters are represented in the SQL statement by a @ marker.
The SQL engine checks each parameter to ensure that it is correct for its column and are treated literally, and not as part of the SQL to be executed.
Another Example
txtNam = getRequestString(“CustomerName”);
txtAdd = getRequestString(“Address”);
txtCit = getRequestString(“City”);
txtSQL = “INSERT INTO Customers (CustomerName,Address,City) Values(@0,@1,@2)”;
db.Execute(txtSQL,txtNam,txtAdd,txtCit);
Examples
The following examples shows how to build parameterized queries in some common web languages.
SELECT STATEMENT IN ASP.NET:txtUserId = getRequestString(“UserId”);
sql = “SELECT * FROM Customers WHERE CustomerId = @0”;
command = new SqlCommand(sql);
command.Parameters.AddWithValue(“@0”,txtUserId);
command.ExecuteReader();
INSERT INTO STATEMENT IN ASP.NET:txtNam = getRequestString(“CustomerName”);
txtAdd = getRequestString(“Address”);
txtCit = getRequestString(“City”);
txtSQL = “INSERT INTO Customers (CustomerName,Address,City) Values(@0,@1,@2)”;
command = new SqlCommand(txtSQL);
command.Parameters.AddWithValue(“@0”,txtNam);
command.Parameters.AddWithValue(“@1”,txtAdd);
command.Parameters.AddWithValue(“@2”,txtCit);
command.ExecuteNonQuery();
INSERT INTO STATEMENT IN PHP:$stmt = $dbh->prepare(“INSERT INTO Customers (CustomerName,Address,City)
VALUES (:nam, :add, :cit)”);
$stmt->bindParam(‘:nam’, $txtNam);
$stmt->bindParam(‘:add’, $txtAdd);
$stmt->bindParam(‘:cit’, $txtCit);
$stmt->execute();
SQL Hosting
If you want your web site to be able to store and retrieve data from a database, your web server should have access to a database-system that uses the SQL language.
If your web server is hosted by an Internet Service Provider (ISP), you will have to look for SQL hosting plans.
The most common SQL hosting databases are MS SQL Server, Oracle, MySQL, and MS Access.
MS SQL Server
Microsoft’s SQL Server is a popular database software for database-driven web sites with high traffic.
SQL Server is a very powerful, robust and full featured SQL database system.
Oracle
Oracle is also a popular database software for database-driven web sites with high traffic.
Oracle is a very powerful, robust and full featured SQL database system.
MySQL
MySQL is also a popular database software for web sites.
MySQL is a very powerful, robust and full featured SQL database system.
MySQL is an inexpensive alternative to the expensive Microsoft and Oracle solutions.
MS Access
When a web site requires only a simple database, Microsoft Access can be a solution.
MS Access is not well suited for very high-traffic, and not as powerful as MySQL, SQL Server, or Oracle.
The data type of a column defines what value the column can hold: integer, character, money, date and time, binary, and so on.
SQL Data Types
Each column in a database table is required to have a name and a data type.
An SQL developer must decide what type of data that will be stored inside each column when creating a table. The data type is a guideline for SQL to understand what type of data is expected inside of each column, and it also identifies how SQL will interact with the stored data.
Note: Data types might have different names in different database. And even if the name is the same, the size and other details may be different! Always check the documentation!
MySQL Data Types (Version 8.0)
In MySQL there are three main data types: string, numeric, and date and time.
String Data Types
| Data type | Description |
|---|---|
| CHAR(size) | A FIXED length string (can contain letters, numbers, and special characters). The size parameter specifies the column length in characters – can be from 0 to 255. Default is 1 |
| VARCHAR(size) | A VARIABLE length string (can contain letters, numbers, and special characters). The size parameter specifies the maximum column length in characters – can be from 0 to 65535 |
| BINARY(size) | Equal to CHAR(), but stores binary byte strings. The size parameter specifies the column length in bytes. Default is 1 |
| VARBINARY(size) | Equal to VARCHAR(), but stores binary byte strings. The size parameter specifies the maximum column length in bytes. |
| TINYBLOB | For BLOBs (Binary Large OBjects). Max length: 255 bytes |
| TINYTEXT | Holds a string with a maximum length of 255 characters |
| TEXT(size) | Holds a string with a maximum length of 65,535 bytes |
| BLOB(size) | For BLOBs (Binary Large OBjects). Holds up to 65,535 bytes of data |
| MEDIUMTEXT | Holds a string with a maximum length of 16,777,215 characters |
| MEDIUMBLOB | For BLOBs (Binary Large OBjects). Holds up to 16,777,215 bytes of data |
| LONGTEXT | Holds a string with a maximum length of 4,294,967,295 characters |
| LONGBLOB | For BLOBs (Binary Large OBjects). Holds up to 4,294,967,295 bytes of data |
| ENUM(val1, val2, val3, …) | A string object that can have only one value, chosen from a list of possible values. You can list up to 65535 values in an ENUM list. If a value is inserted that is not in the list, a blank value will be inserted. The values are sorted in the order you enter them |
| SET(val1, val2, val3, …) | A string object that can have 0 or more values, chosen from a list of possible values. You can list up to 64 values in a SET list |
Numeric Data Types
| Data type | Description |
|---|---|
| BIT(size) | A bit-value type. The number of bits per value is specified in size. The size parameter can hold a value from 1 to 64. The default value for size is 1. |
| TINYINT(size) | A very small integer. Signed range is from -128 to 127. Unsigned range is from 0 to 255. The size parameter specifies the maximum display width (which is 255) |
| BOOL | Zero is considered as false, nonzero values are considered as true. |
| BOOLEAN | Equal to BOOL |
| SMALLINT(size) | A small integer. Signed range is from -32768 to 32767. Unsigned range is from 0 to 65535. The size parameter specifies the maximum display width (which is 255) |
| MEDIUMINT(size) | A medium integer. Signed range is from -8388608 to 8388607. Unsigned range is from 0 to 16777215. The size parameter specifies the maximum display width (which is 255) |
| INT(size) | A medium integer. Signed range is from -2147483648 to 2147483647. Unsigned range is from 0 to 4294967295. The size parameter specifies the maximum display width (which is 255) |
| INTEGER(size) | Equal to INT(size) |
| BIGINT(size) | A large integer. Signed range is from -9223372036854775808 to 9223372036854775807. Unsigned range is from 0 to 18446744073709551615. The size parameter specifies the maximum display width (which is 255) |
| FLOAT(size, d) | A floating point number. The total number of digits is specified in size. The number of digits after the decimal point is specified in the d parameter. This syntax is deprecated in MySQL 8.0.17, and it will be removed in future MySQL versions |
| FLOAT(p) | A floating point number. MySQL uses the p value to determine whether to use FLOAT or DOUBLE for the resulting data type. If p is from 0 to 24, the data type becomes FLOAT(). If p is from 25 to 53, the data type becomes DOUBLE() |
| DOUBLE(size, d) | A normal-size floating point number. The total number of digits is specified in size. The number of digits after the decimal point is specified in the d parameter |
| DOUBLE PRECISION(size, d) | |
| DECIMAL(size, d) | An exact fixed-point number. The total number of digits is specified in size. The number of digits after the decimal point is specified in the d parameter. The maximum number for size is 65. The maximum number for d is 30. The default value for size is 10. The default value for d is 0. |
| DEC(size, d) | Equal to DECIMAL(size,d) |
Note: All the numeric data types may have an extra option: UNSIGNED or ZEROFILL. If you add the UNSIGNED option, MySQL disallows negative values for the column. If you add the ZEROFILL option, MySQL automatically also adds the UNSIGNED attribute to the column.
Date and Time Data Types
| Data type | Description |
|---|---|
| DATE | A date. Format: YYYY-MM-DD. The supported range is from ‘1000-01-01’ to ‘9999-12-31’ |
| DATETIME(fsp) | A date and time combination. Format: YYYY-MM-DD hh:mm:ss. The supported range is from ‘1000-01-01 00:00:00’ to ‘9999-12-31 23:59:59’. Adding DEFAULT and ON UPDATE in the column definition to get automatic initialization and updating to the current date and time |
| TIMESTAMP(fsp) | A timestamp. TIMESTAMP values are stored as the number of seconds since the Unix epoch (‘1970-01-01 00:00:00’ UTC). Format: YYYY-MM-DD hh:mm:ss. The supported range is from ‘1970-01-01 00:00:01’ UTC to ‘2038-01-09 03:14:07’ UTC. Automatic initialization and updating to the current date and time can be specified using DEFAULT CURRENT_TIMESTAMP and ON UPDATE CURRENT_TIMESTAMP in the column definition |
| TIME(fsp) | A time. Format: hh:mm:ss. The supported range is from ‘-838:59:59’ to ‘838:59:59’ |
| YEAR | A year in four-digit format. Values allowed in four-digit format: 1901 to 2155, and 0000. MySQL 8.0 does not support year in two-digit format. |
ADVERTISEMENT
SQL Server Data Types
String Data Types
| Data type | Description | Max size | Storage |
|---|---|---|---|
| char(n) | Fixed width character string | 8,000 characters | Defined width |
| varchar(n) | Variable width character string | 8,000 characters | 2 bytes + number of chars |
| varchar(max) | Variable width character string | 1,073,741,824 characters | 2 bytes + number of chars |
| text | Variable width character string | 2GB of text data | 4 bytes + number of chars |
| nchar | Fixed width Unicode string | 4,000 characters | Defined width x 2 |
| nvarchar | Variable width Unicode string | 4,000 characters | |
| nvarchar(max) | Variable width Unicode string | 536,870,912 characters | |
| ntext | Variable width Unicode string | 2GB of text data | |
| binary(n) | Fixed width binary string | 8,000 bytes | |
| varbinary | Variable width binary string | 8,000 bytes | |
| varbinary(max) | Variable width binary string | 2GB | |
| image | Variable width binary string | 2GB |
Numeric Data Types
| Data type | Description | Storage |
|---|---|---|
| bit | Integer that can be 0, 1, or NULL | |
| tinyint | Allows whole numbers from 0 to 255 | 1 byte |
| smallint | Allows whole numbers between -32,768 and 32,767 | 2 bytes |
| int | Allows whole numbers between -2,147,483,648 and 2,147,483,647 | 4 bytes |
| bigint | Allows whole numbers between -9,223,372,036,854,775,808 and 9,223,372,036,854,775,807 | 8 bytes |
| decimal(p,s) | Fixed precision and scale numbers.Allows numbers from -10^38 +1 to 10^38 –1.The p parameter indicates the maximum total number of digits that can be stored (both to the left and to the right of the decimal point). p must be a value from 1 to 38. Default is 18.The s parameter indicates the maximum number of digits stored to the right of the decimal point. s must be a value from 0 to p. Default value is 0 | 5-17 bytes |
| numeric(p,s) | Fixed precision and scale numbers.Allows numbers from -10^38 +1 to 10^38 –1.The p parameter indicates the maximum total number of digits that can be stored (both to the left and to the right of the decimal point). p must be a value from 1 to 38. Default is 18.The s parameter indicates the maximum number of digits stored to the right of the decimal point. s must be a value from 0 to p. Default value is 0 | 5-17 bytes |
| smallmoney | Monetary data from -214,748.3648 to 214,748.3647 | 4 bytes |
| money | Monetary data from -922,337,203,685,477.5808 to 922,337,203,685,477.5807 | 8 bytes |
| float(n) | Floating precision number data from -1.79E + 308 to 1.79E + 308.The n parameter indicates whether the field should hold 4 or 8 bytes. float(24) holds a 4-byte field and float(53) holds an 8-byte field. Default value of n is 53. | 4 or 8 bytes |
| real | Floating precision number data from -3.40E + 38 to 3.40E + 38 | 4 bytes |
Date and Time Data Types
| Data type | Description | Storage |
|---|---|---|
| datetime | From January 1, 1753 to December 31, 9999 with an accuracy of 3.33 milliseconds | 8 bytes |
| datetime2 | From January 1, 0001 to December 31, 9999 with an accuracy of 100 nanoseconds | 6-8 bytes |
| smalldatetime | From January 1, 1900 to June 6, 2079 with an accuracy of 1 minute | 4 bytes |
| date | Store a date only. From January 1, 0001 to December 31, 9999 | 3 bytes |
| time | Store a time only to an accuracy of 100 nanoseconds | 3-5 bytes |
| datetimeoffset | The same as datetime2 with the addition of a time zone offset | 8-10 bytes |
| timestamp | Stores a unique number that gets updated every time a row gets created or modified. The timestamp value is based upon an internal clock and does not correspond to real time. Each table may have only one timestamp variable |
Other Data Types
| Data type | Description |
|---|---|
| sql_variant | Stores up to 8,000 bytes of data of various data types, except text, ntext, and timestamp |
| uniqueidentifier | Stores a globally unique identifier (GUID) |
| xml | Stores XML formatted data. Maximum 2GB |
| cursor | Stores a reference to a cursor used for database operations |
| table | Stores a result-set for later processing |
MS Access Data Types
| Data type | Description | Storage |
|---|---|---|
| Text | Use for text or combinations of text and numbers. 255 characters maximum | |
| Memo | Memo is used for larger amounts of text. Stores up to 65,536 characters. Note: You cannot sort a memo field. However, they are searchable | |
| Byte | Allows whole numbers from 0 to 255 | 1 byte |
| Integer | Allows whole numbers between -32,768 and 32,767 | 2 bytes |
| Long | Allows whole numbers between -2,147,483,648 and 2,147,483,647 | 4 bytes |
| Single | Single precision floating-point. Will handle most decimals | 4 bytes |
| Double | Double precision floating-point. Will handle most decimals | 8 bytes |
| Currency | Use for currency. Holds up to 15 digits of whole dollars, plus 4 decimal places. Tip: You can choose which country’s currency to use | 8 bytes |
| AutoNumber | AutoNumber fields automatically give each record its own number, usually starting at 1 | 4 bytes |
| Date/Time | Use for dates and times | 8 bytes |
| Yes/No | A logical field can be displayed as Yes/No, True/False, or On/Off. In code, use the constants True and False (equivalent to -1 and 0). Note: Null values are not allowed in Yes/No fields | 1 bit |
| Ole Object | Can store pictures, audio, video, or other BLOBs (Binary Large OBjects) | up to 1GB |
| Hyperlink | Contain links to other files, including web pages | |
| Lookup Wizard | Let you type a list of options, which can then be chosen from a drop-down list | 4 bytes |
Hi! Great day! Welcome back to this course. Thank you for taking a continuous interest in this course. Continually learning from this course will help you become adept at it.
Just a reminder that this course is open for 1 semester from the day this is opened by a student or until the institution’s stipulated deadline, whichever comes first.
Let’s continue to where we left off last week:
Basic SQL Commands
The SQL SHOW statement displays information contained in the database and its tables. This helpful tool lets you keep track of your database contents and remind yourself about the structure of your tables.
For example, the SHOW DATABASES command lists the databases managed by the server.
SHOW DATABASES
Throughout the tutorial we will be using the MySQL engine and the PHPMyAdmin tool to run SQL queries.
The easiest way to get MySQL and PHPMyAdmin is to install free tools like XAMPP or WAMP, which include all necessary installers.
Basic SQL Commands
The SHOW TABLES command is used to display all of the tables in the currently selected MySQL database.
For our example, we have created a database, my_database, with a table called customers.
Basic SQL Commands
SHOW COLUMNS displays information about the columns in a given table.
The following example displays the columns in our customers table:
SHOW COLUMNS FROM customers
Result:
SHOW COLUMNS displays the following values for each table column:
Field: column name
Type: column data type
Key: indicates whether the column is indexed
Default: default value assigned to the column
Extra: may contain any additional information that is available about a given column
The columns for the customers table have also been created using the PHPMyAdmin tool.
SELECT Statement
The SELECT statement is used to select data from a database.
The result is stored in a result table, which is called the result-set.
A query may retrieve information from selected columns or from all columns in the table.
To create a simple SELECT statement, specify the name(s) of the column(s) you need from the table.
Syntax of the SQL SELECT Statement:
SELECT column_list
FROM table_name
– column_list includes one or more columns from which data is retrieved
– table-name is the name of the table from which the information is retrieved
Below is the data from our customers table:
The following SQL statement selects the FirstName from the customers table:
SELECT FirstName FROM customers
A SELECT statement retrieves zero or more rows from one or more database tables.
Hi! Great day! Welcome back to this course. Thank you for taking a continuous interest in this course. Continually learning from this course will help you become adept at it.
Just a reminder that this course is open for 1 semester from the day this is opened by a student or until the institution’s stipulated deadline, whichever comes first.
Let’s continue to where we left off last week:
Multiple Queries
SQL allows to run multiple queries or commands at the same time.
The following SQL statement selects the FirstName and City columns from the customers table:
SELECT FirstName FROM customers;
SELECT City FROM customers;
Result:
Remember to end each SQL statement with a semicolon to indicate that the statement is complete and ready to be interpreted.
In this tutorial, we will use semicolon at the end of each SQL statement.
Case Sensitivity
SQL is case insensitive.
The following statements are equivalent and will produce the same result:
select City from customers;
SELECT City FROM customers;
sElEct City From customers;
It is common practice to write all SQL commands in upper-case.
Syntax Rules
A single SQL statement can be placed on one or more text lines. In addition, multiple SQL statements can be combined on a single text line.
White spaces and multiple lines are ignored in SQL.
For example, the following query is absolutely correct.
SELECT City
FROM customers;
However, it is recommended to avoid unnecessary white spaces and lines.
Combined with proper spacing and indenting, breaking up the commands into logical lines will make your SQL statements much easier to read and maintain.
Hi! Great day! Welcome back to this course. Thank you for taking a continuous interest in this course. Continually learning from this course will help you become adept at it.
Just a reminder that this course is open for 1 semester from the day this is opened by a student or until the institution’s stipulated deadline, whichever comes first.
Let’s continue to where we left off last week:
Selecting Multiple Columns
As previously mentioned, the SQL SELECT statement retrieves records from tables in your SQL database.
You can select multiple table columns at once.
Just list the column names, separated by commas
SELECT FirstName, LastName, City
FROM customers;
Result:
Do not put a comma after the last column name.
Selecting All Columns
To retrieve all of the information contained in your table, place an asterisk (*) sign after the SELECT command, rather than typing in each column names separately.
The following SQL statement selects all of the columns in the customers table:
SELECT * FROM customers;
Result:
In SQL, the asterisk means all.
Hi! Great day! Welcome back to this course. Thank you for taking a continuous interest in this course. Continually learning from this course will help you become adept at it.
Just a reminder that this course is open for 1 semester from the day this is opened by a student or until the institution’s stipulated deadline, whichever comes first.
Let’s continue to where we left off last week:
The DISTINCT Keyword
In situations in which you have multiple duplicate records in a table, it might make more sense to return only unique records, instead of fetching the duplicates.
The SQL DISTINCT keyword is used in conjunction with SELECT to eliminate all duplicate records and return only unique ones.
The basic syntax of DISTINCT is as follows:
SELECT DISTINCT column_name1, column_name2
FROM table_name;
See the customers table below:
Note that there are duplicate City names. The following SQL statement selects only distinct values from the City column:
SELECT DISTINCT City FROM customers;
This would produce the following result. Duplicate entries have been removed.
The DISTINCT keyword only fetches the unique values.
The LIMIT Keyword
By default, all results that satisfy the conditions specified in the SQL statement are returned. However, sometimes we need to retrieve just a subset of records. In MySQL, this is accomplished by using the LIMIT keyword.
The syntax for LIMIT is as follows:
SELECT column list
FROM table_name
LIMIT [number of records];
For example, we can retrieve the first five records from the customers table.
SELECT ID, FirstName, LastName, City
FROM customers LIMIT 5;
This would produce the following result:
By default, all results that satisfy the conditions specified in the SQL statement are returned.
The LIMIT Keyword
You can also pick up a set of records from a particular offset.
In the following example, we pick up four records, starting from the third position:
SELECT ID, FirstName, LastName, City
FROM customers OFFSET 3 LIMIT 4;
This would produce the following result:
The reason that it produces results starting from ID number four, and not three, is that MySQL starts counting from zero, meaning that the offset of the first row is 0, not 1.
Hi! Great day! Welcome back to this course. Thank you for taking a continuous interest in this course. Continually learning from this course will help you become adept at it.
Just a reminder that this course is open for 1 semester from the day this is opened by a student or until the institution’s stipulated deadline, whichever comes first.
Let’s continue to where we left off last week:
Fully Qualified Names
In SQL, you can provide the table name prior to the column name, by separating them with a dot.
The following statements are equivalent:
SELECT City FROM customers;
SELECT customers.City FROM customers;
The term for the above-mentioned syntax is called the “fully qualified name” of that column.
This form of writing is especially useful when working with multiple tables that may share the same column names.
Order By
ORDER BY is used with SELECT to sort the returned data.
The following example sorts our customers table by the FirstName column.
SELECT * FROM customers
ORDER BY FirstName;
Result:
As you can see, the rows are ordered alphabetically by the FirstName column.
By default, the ORDER BY keyword sorts the results in ascending order.
Sorting Multiple Columns
ORDER BY can sort retrieved data by multiple columns. When using ORDER BY with more than one column, separate the list of columns to follow ORDER BY with commas.
Here is the customers table, showing the following records:
To order by LastName and Age:
SELECT * FROM customers
ORDER BY LastName, Age;
This ORDER BY statement returns the following result:
As we have two Smiths, they will be ordered by the Age column in ascending order.
The ORDER BY command starts ordering in the same sequence as the columns. It will order by the first column listed, then by the second, and so on.
Assignment: Rewrite all the lessons above in your own words and pictures.
Mini project: Create your own simple database system wherein all the lessons can be tested with at least 1 result. Any data or information can be used for as long as it is understandable, reasonable, and realistic but not random. Video record parts of how you actually made your own database system within 5-10min. Submit it along with at least 10 screenshots of your tests with the sql statements used and the results of it. Zip or Rar all of your files to make it 1 file for submission. Rename its filename to studentfamilyname_dbsystem.zip or .rar.